Sweet donuts with a chewy bouncy texture that are unlike your traditional ones! These easy mochi donuts are made with simple ingredients and great for dessert or as a snack! [Dairy-free and gluten-free adaptable]
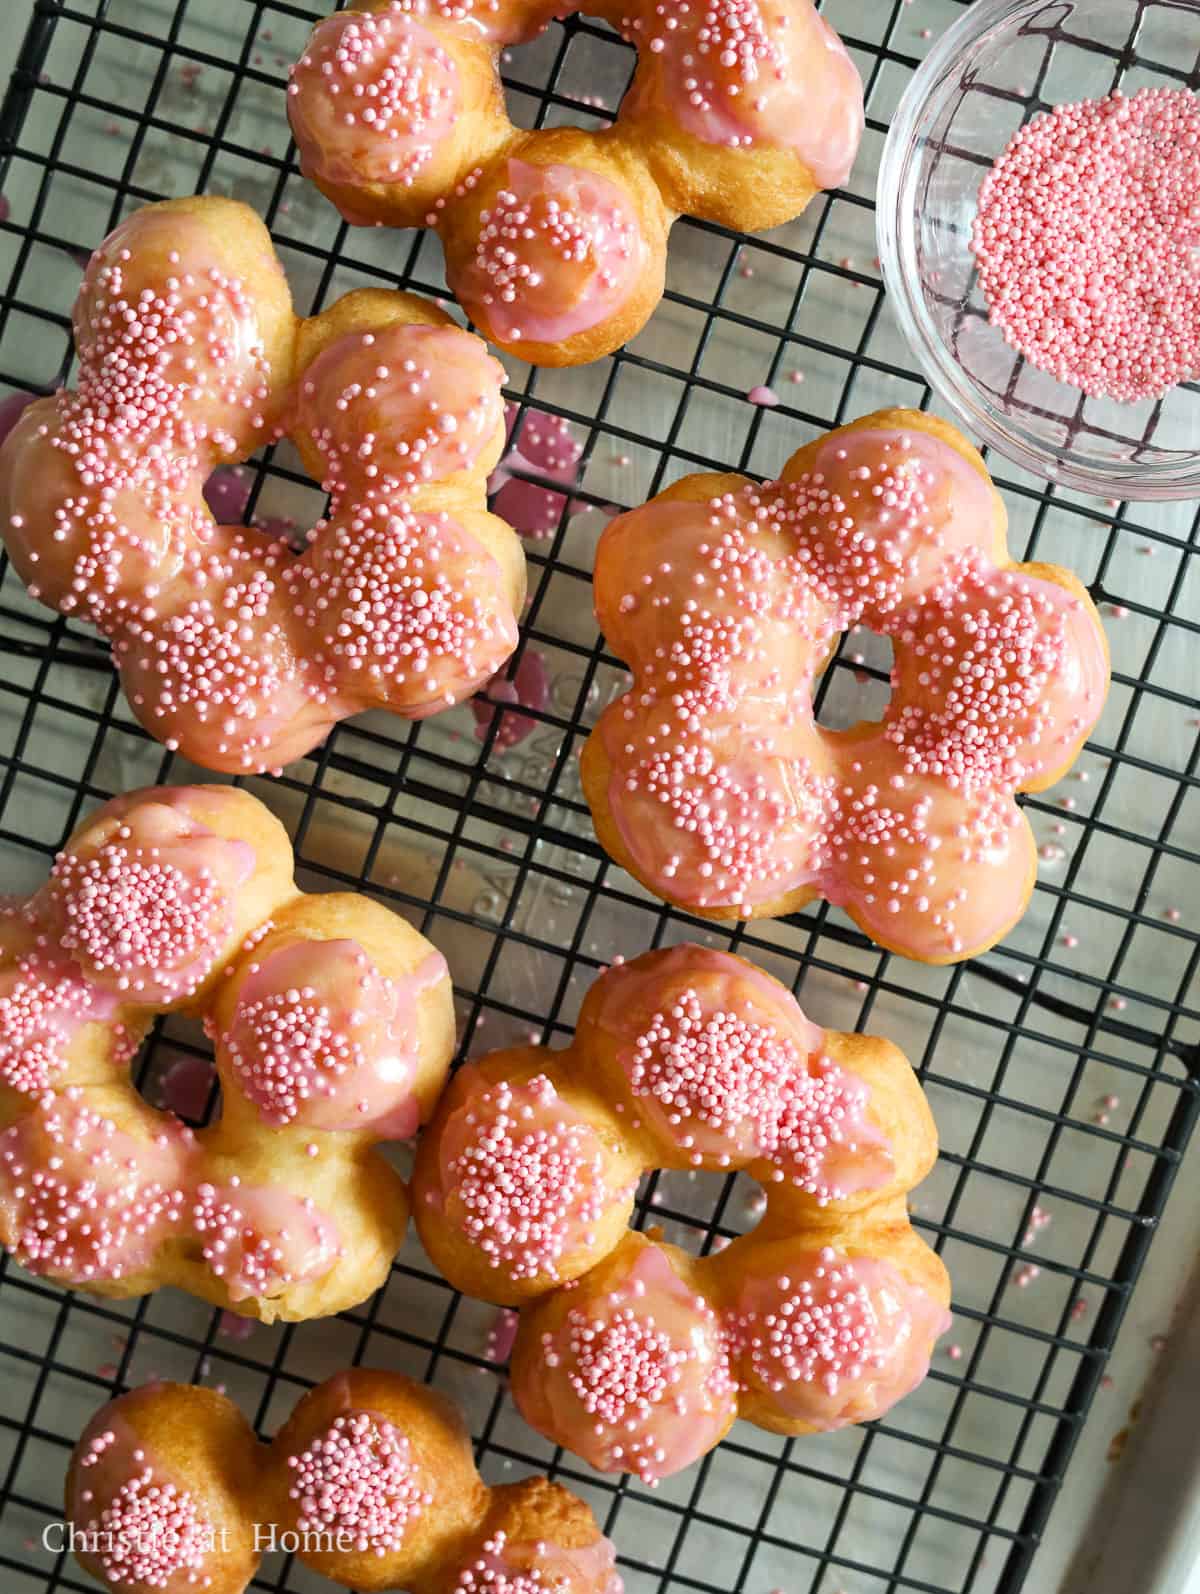
Mochi donuts (or "Pon de Ring" donuts) are Japanese donuts with a moist and chewy texture. The dough is made sweet glutinous rice flour, tapioca starch, white granulated sugar, milk, egg and neutral oil.
The glutinous rice flour and tapioca starch are the key ingredients that differentiate this donut from regular American donuts and are responsible for that chewy texture.
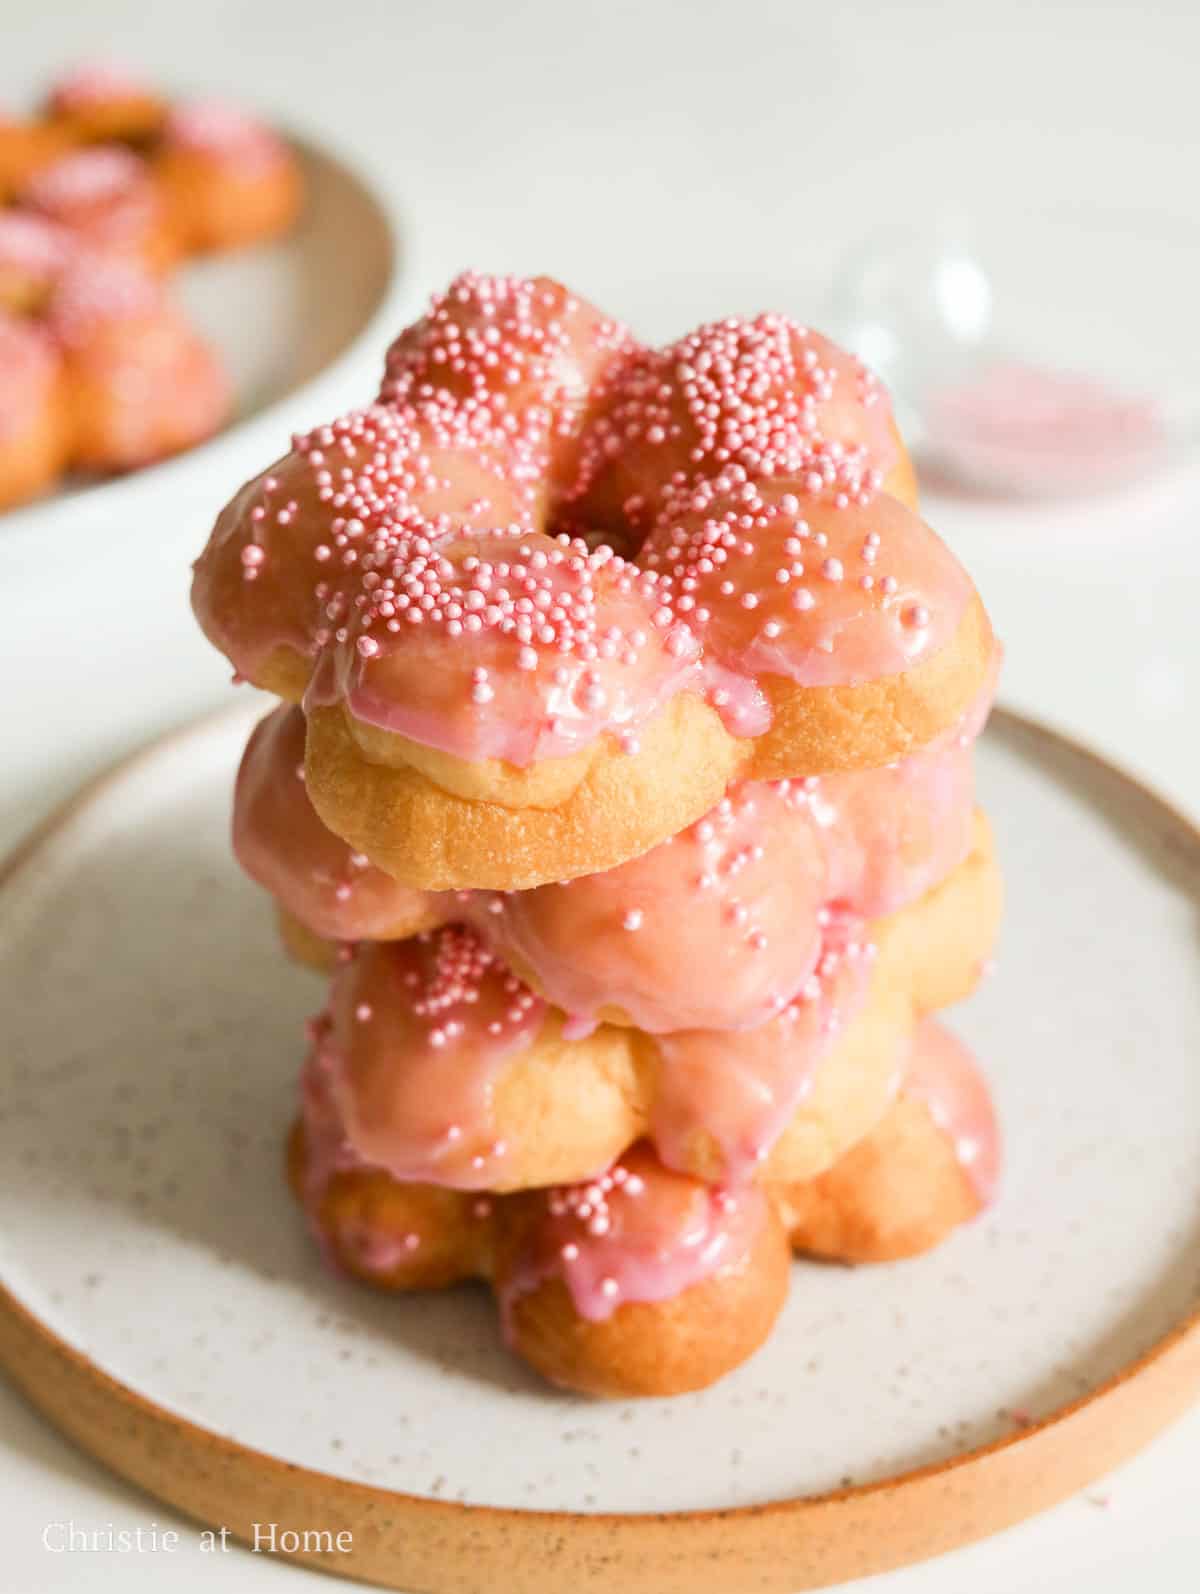
These Japanese donuts are made of little balls of dough stuck together to create a circular ring shape and deep fried in hot oil. Then coated with a variety of glazes or sprinkled toppings.
Glazes can include chocolate, coffee, black sesame, white chocolate, matcha, nutella, strawberry and more! The sprinkled toppings can also include colorful sprinkles, chocolate chips, coconut flakes, oreo cookies and the list goes on!
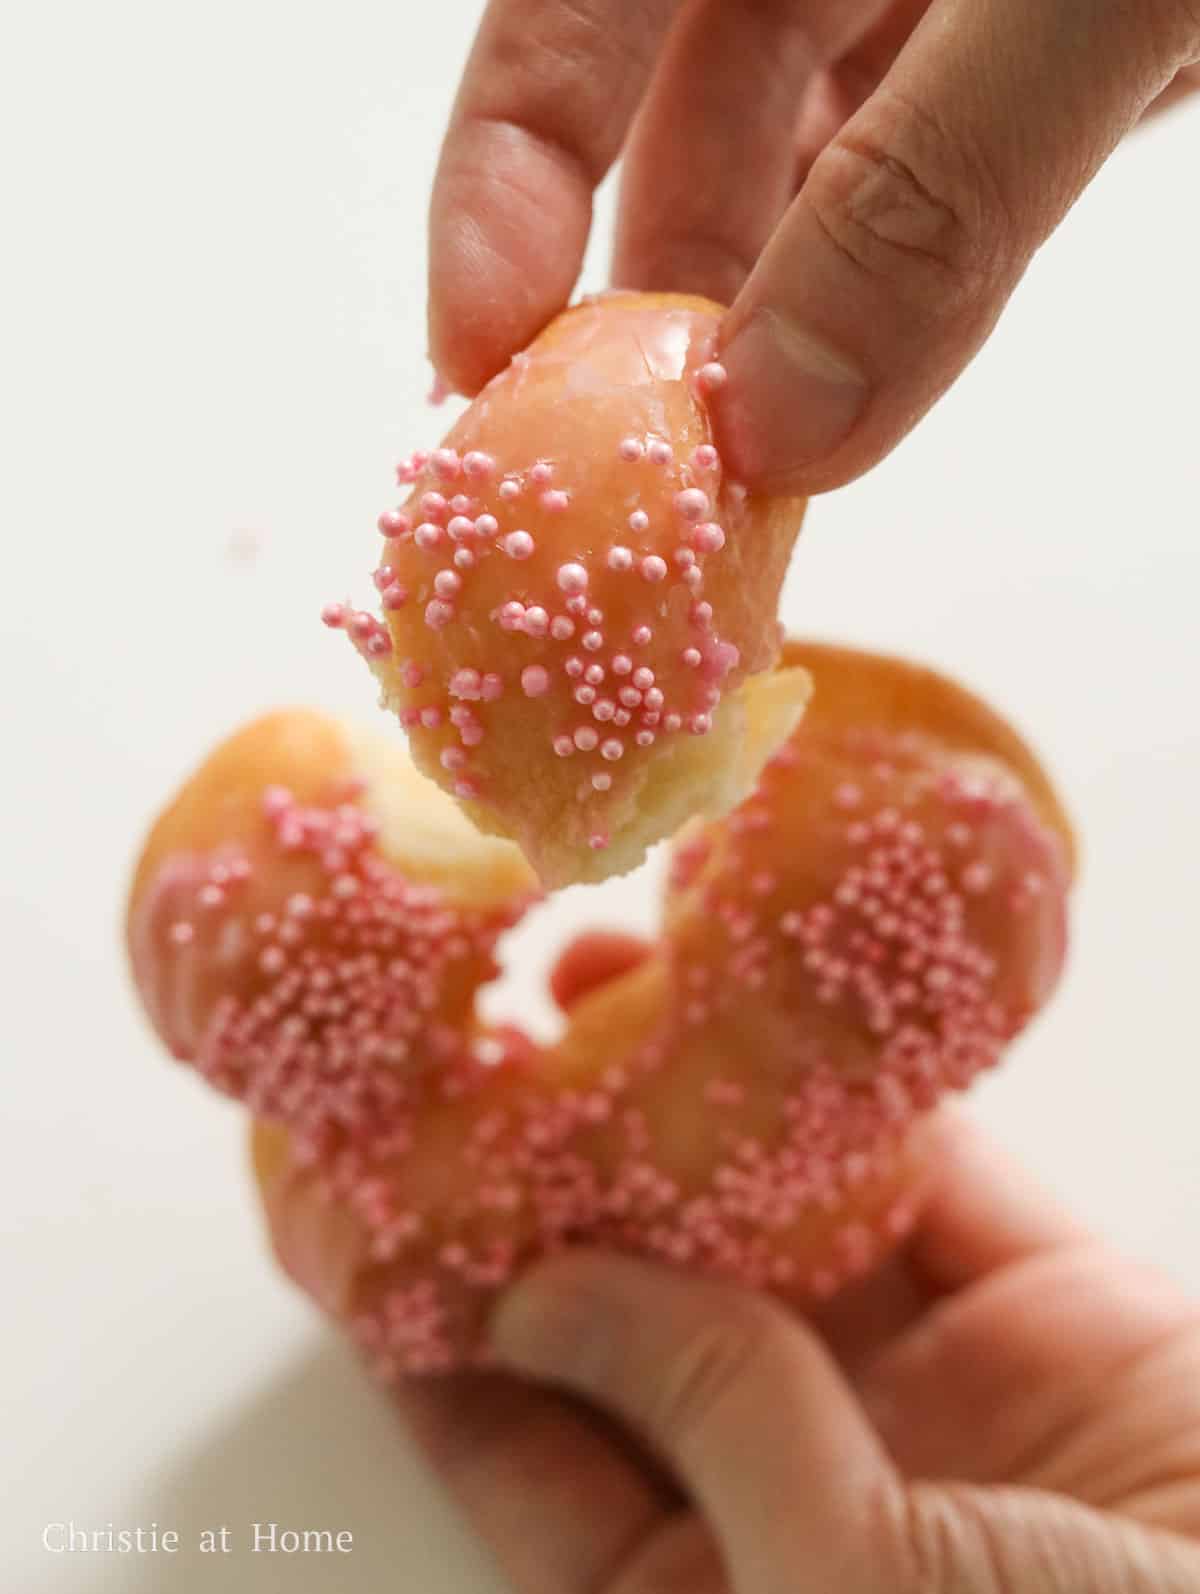
The earliest form of mochi donuts came from Hawaii fusing the concept of American donuts with Japanese mochi. The best way to eat them is to tear the donut into smaller balls, so you can enjoy that chewy soft texture in each bite!
This trend food is popular in Japan, South Korea and now in North America! I love these Asian donuts so much because the texture is so unique and they're easy to make at home with minimal ingredients. You also don't need a special donut pan.
Ingredients & Substitutes
Please scroll down to below recipe card for exact measurements.
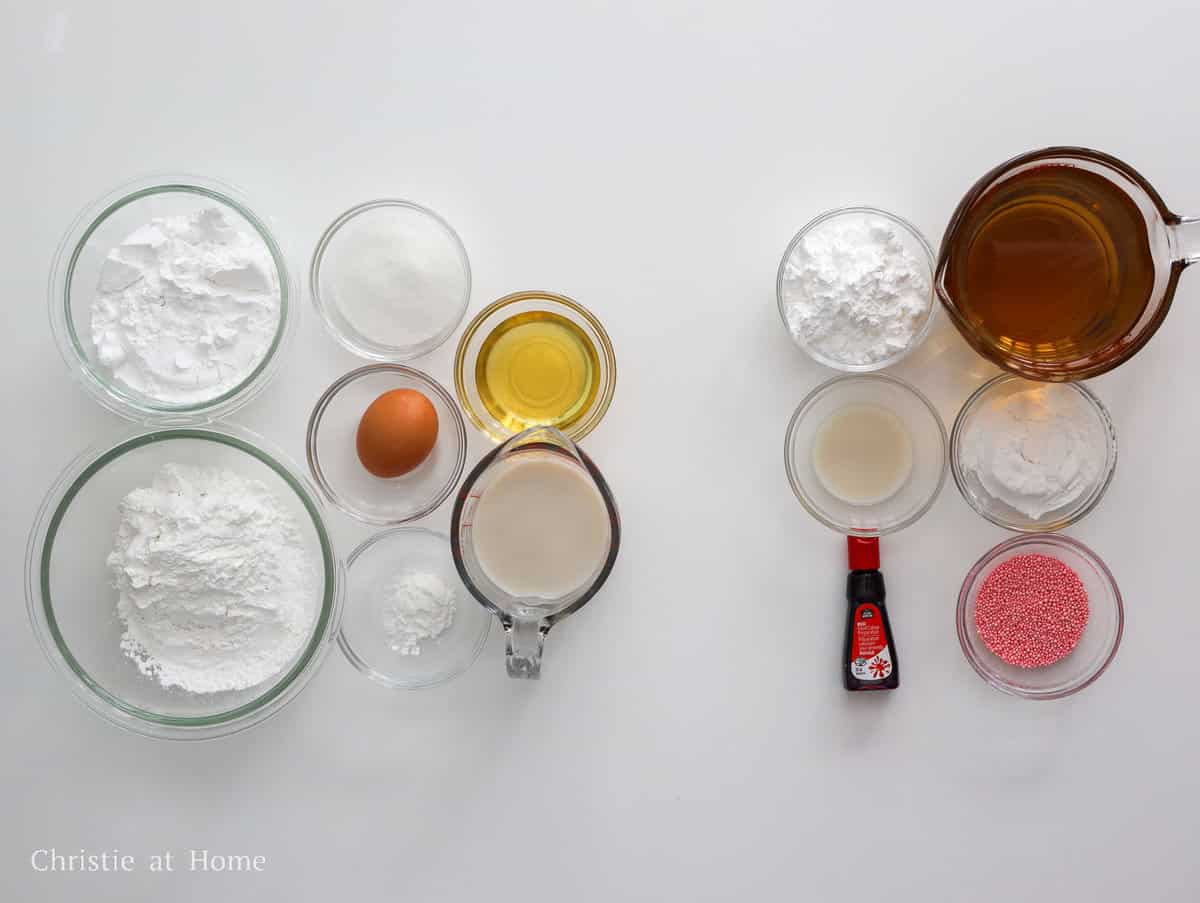
- Neutral oil: like avocado oil, sunflower oil, grapeseed oil, peanut oil, vegetable oil or canola oil with a high smoke point. Avoid olive oil that has a low smoke point.
- Tapioca Starch
- Tiny Sprinkles: are recommended over larger sprinkles so they can stick to the donut better. Use any color of choice. If you're gluten-free, substitute with gluten-free sprinkles.
Dry Dough Ingredients
- Glutinous Rice Flour (aka Sweet Mochiko Flour): this flour is made of grounded short-grain rice or sticky rice. Make sure it's "Glutinous Rice flour" not "rice flour" or you won't get the same results.
- Tapioca Starch: to add extra chewiness to the donut. I don't recommend using another substitute. Most Asian grocery stores, select Western grocers or online retailers will sell this.
- Baking Powder
- White Granulated Sugar
Wet Dough Ingredients
- Milk: or substitute with plain oat milk or almond milk for a dairy-free version.
- Large Egg
- Neutral oil: like avocado oil, sunflower oil, grapeseed oil, peanut oil, vegetable oil or canola oil. Avoid olive oil, coconut oil or any heavy scented oils.
Glaze
- Powdered Icing Sugar: aka confectioner's sugar to create the glaze.
- Milk: or substitute with plain oat milk or almond milk for a dairy-free version.
- Red Food Coloring: or feel free to use any color of your choice.
Expert Tips
- Cut the parchment paper squares and laid out on a large baking sheet, before rolling the donut balls.
- Evenly divide the dough as instructed so you have even-sized donut balls. Each ball should be around 1 inch wide.
- Don't roll all the balls at once or they will lose their stickiness making it difficult to create a donut. Instead roll each ball at a time and stick them together as you go.
- Have a wire rack set on top of a large baking sheet ready before deep frying and situate it next to your hot pan of oil so the oil doesn't drip all over the stove top.
- Make sure the oil is hot enough before frying (around 360 degrees F) or this can lead to undercooked donuts.
- Fry one donut at a time to maintain oil temperature and avoid frying in large batches.
- Drain the fried donuts on a wire rack or paper towel lined plate to remove excess oil which can create soggy donuts.
- Let the donuts cool down before glazing or it’ll melt the glaze.
- Let excess glaze drip off the donut and then transfer to a wire rack for the sprinkles.
Instructions
Below are step-by-step instructions on how to make mochi donuts:
Prepare Dough
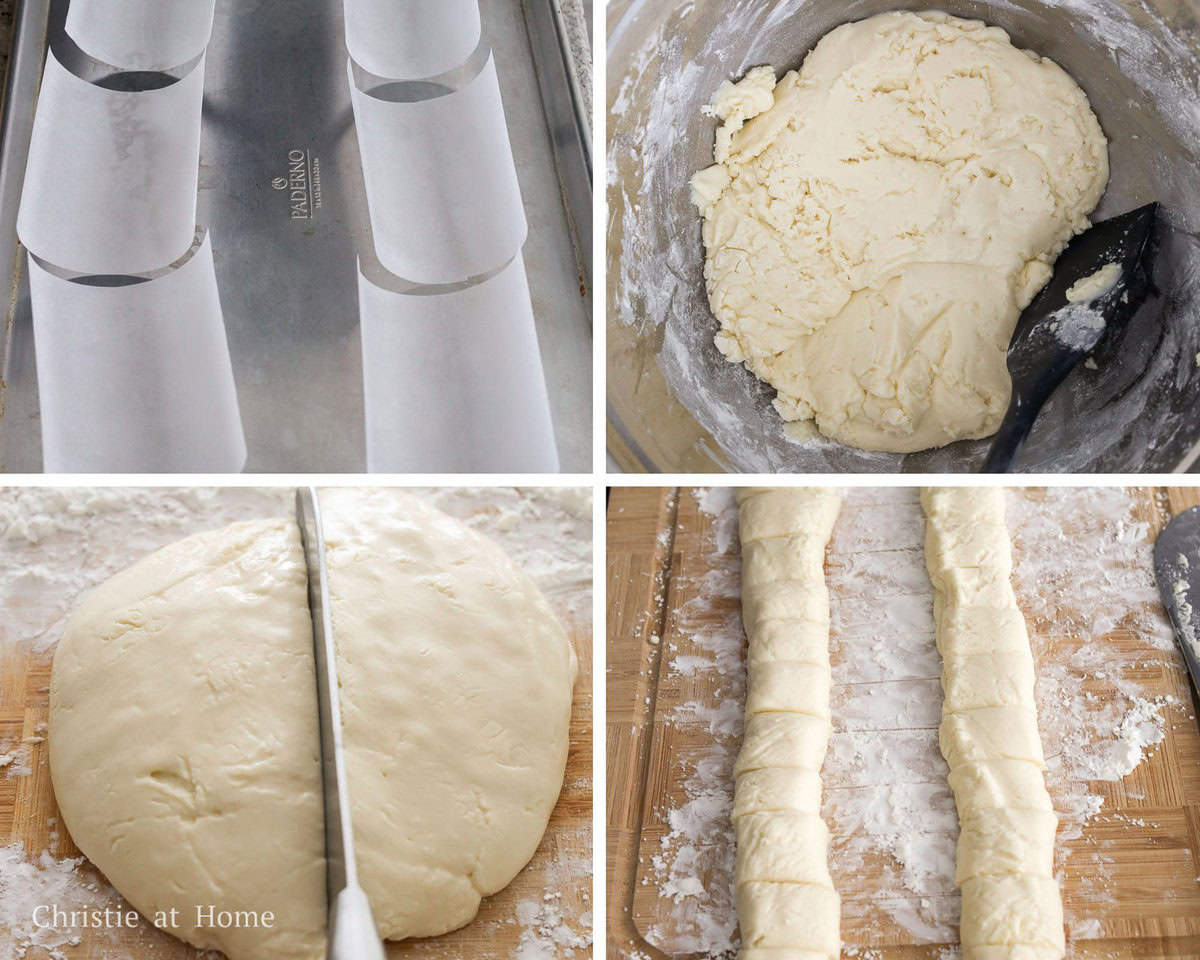
- Cut 6 pieces of 4 x 4 inch parchment paper squares and place them onto a large baking sheet. Set aside.
- In a large mixing bowl, whisk together dry ingredients. Then whisk in wet ingredients until well combined. It should be tacky but slightly dry enough so you can work with it.
- Scrape the sides of the bowl with a spatula and transfer the ball of dough onto a large working surface lightly dusted with tapioca starch. Roll the dough into a smooth ball and slice it into two equal portions with a dough cutter or knife.
- Then roll out each piece of dough into two 1-inch thick logs. Cut each log into 15 equal pieces at 1 inch wide.
Fry & Glaze Donuts
- Gently roll a piece of dough into a ball - don't be too rough or the ball will break apart. After rolling the first ball, place it onto one parchment paper square and as you roll the next ball quickly stick it the first ball, until you have 5 balls per donut to create a circular ring shape. Repeat this process until you have have 6 donuts. (Do not roll all 30 balls all at once or they won't stick as easily to create the donut).
- Heat 2 cups or 500 ml of vegetable oil in a large heavy bottomed pan on medium heat or until 375 degrees F with a digital instant read thermometer. If you don’t own a thermometer, insert a wooden utensil into the oil and check for bubbles.
- Once the oil is hot, carefully lower one donut with the parchment paper underneath into the hot oil using a slotted spoon or spatula. Ensure the donut is fully submerged into the oil.
- Fry the donut for 20 seconds and then slowly remove the parchment paper square with kitchen tweezers or tongs discarding it.
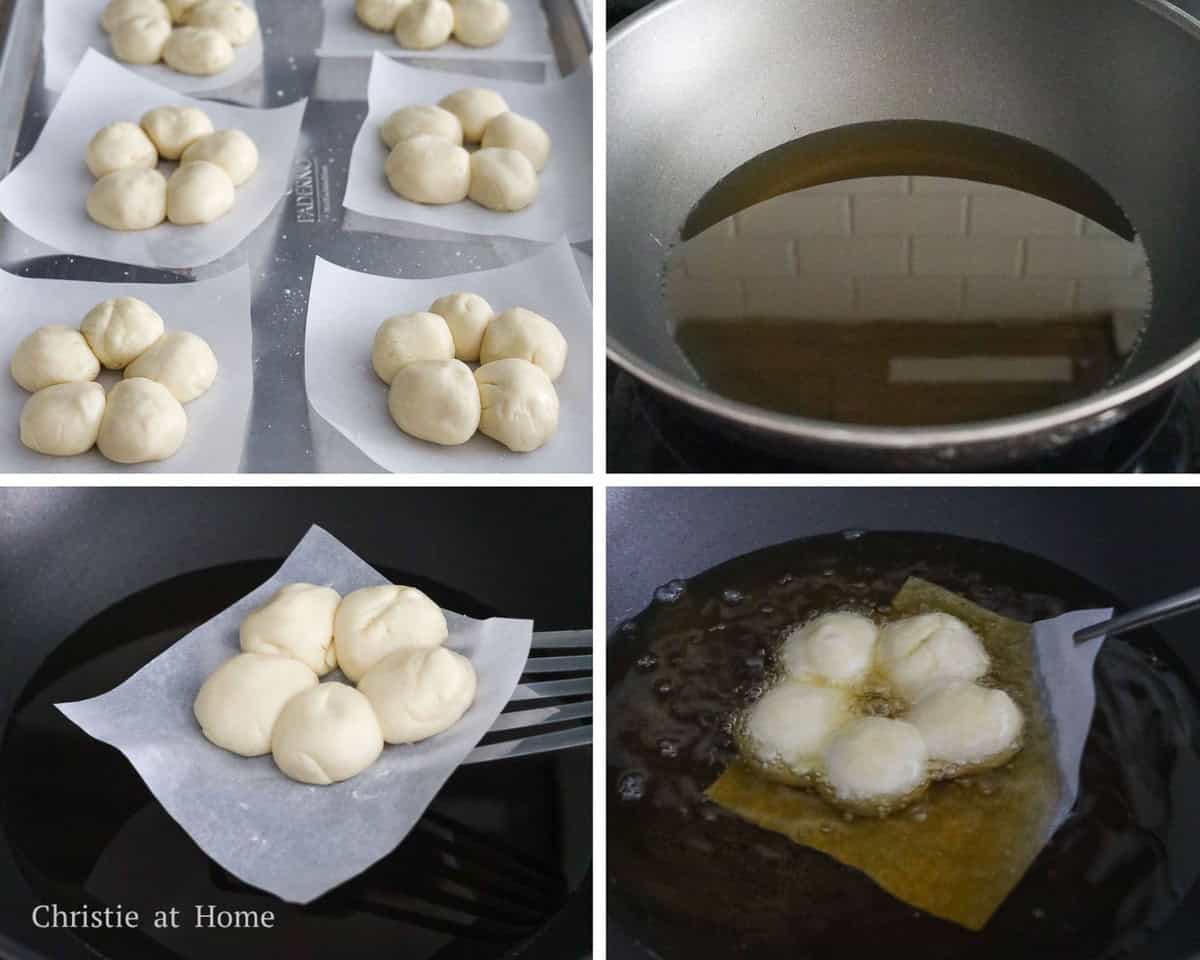
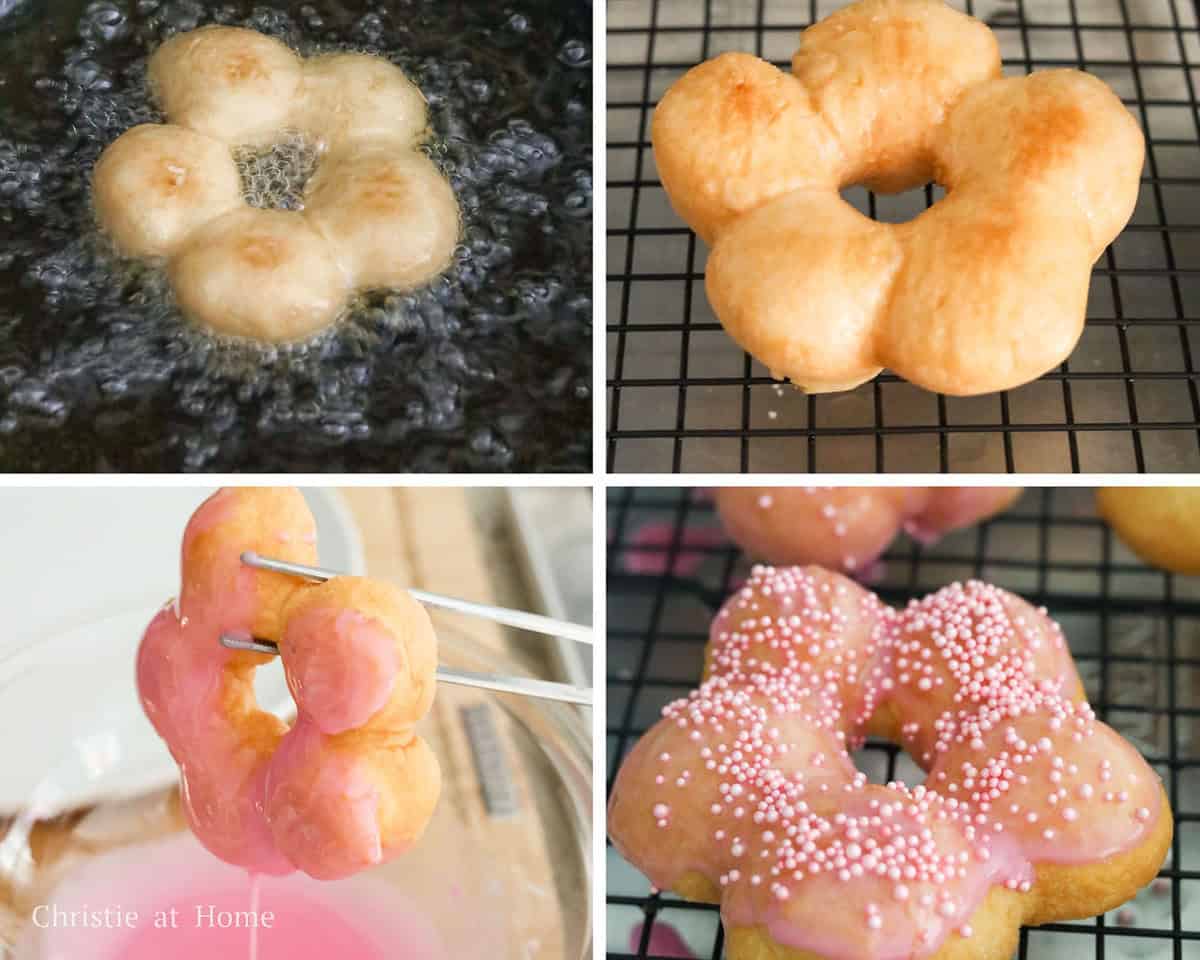
- Deep fry the donut in the center of the pan for 3-4 minutes in total until golden brown, carefully flipping over halfway. Repeat this process for remaining donuts and fry one at a time.
- Remove and transfer the fried donut onto a wire rack or paper towel lined plate to remove excess oil and to cool down completely.
- To make the glaze, in a small bowl whisk together powdered icing sugar with 1 tablespoon or 15 ml milk and red food coloring. Dip the donuts round side up into the glaze, dripping off excess glaze.
- Then transfer glazed donuts (glazed side up) to a wire rack resting on top of a large baking sheet. Quickly add ½ teaspoon sprinkles to each donut while the glaze is still wet. Enjoy!
Storage
- Mochi donuts are best enjoyed fresh or within the same day for that chewy texture.
- Leftovers can be stored up to 4 days in an airtight container at room temperature.
- If you want to reheat them, microwave each donut for 30 seconds or until warm.
- Freezer-friendly? I don't recommend freezing mochi donuts as they turn hard even after reheating.
Pairing Suggestions
Mochi donuts serve well on their own but can be served with:
- coffee, tea, milk, or juice
- baked goods like cookies, danishes, or pastries
- fresh fruit
- desserts like ice cream or frozen yogurt
FAQ
Mochi donuts are best enjoyed fresh or within the same day as making them but you can make them up to 4 days in advance and store them in an airtight container at room temperature. If you want to reheat them, microwave each donut for 30 seconds or until warm.
I don't recommend baking or air frying mochi donuts because they get overly crispy on the outside even though they are chewy on the inside. Therefore, it's best to deep fry them.
Leftover oil can be reused a couple more times. To do this, allow the hot oil to cool down completely in the pan and remove any browned bits. Then transfer the cool oil to a sealed airtight container and store it in the fridge. It will last up to 2 months. If the oil begins to look cloudy, do not use it and compost it.
Other recipes you may like
📖 Recipe

Easy & Simple Mochi Donuts
Ingredients
- 2 cups vegetable oil or any neutral oil for deep frying
- 3 tablespoon tapioca starch to dust work surface
- 3 teaspoon sprinkles tiny kind (or gluten-free sprinkles)
Dry Dough Ingredients
- 1 ¼ cup glutinous rice flour
- 1 ¼ cup tapioca starch
- 1 teaspoon baking powder
- ¼ cup white granulated sugar
Wet Dough Ingredients
- ¾ cup milk or plain oat milk or almond milk for a dairy-free version
- 2 ½ tablespoon vegetable oil or any neutral oil
- 1 large egg
Glaze
- 6 tablespoon powdered sugar aka confectioner sugar or icing sugar
- 1.5 tablespoon milk or plain oat milk or almond milk for a dairy-free version
- 2 drops red food colouring or any color you like
Instructions
- Cut 6 pieces of 4 x 4 inch parchment paper squares and place them onto a large baking sheet. Set aside.
- To make the dough: whisk together dry ingredients in a large mixing bowl. Then whisk in wet ingredients until well combined. The dough should be tacky but slightly dry enough so you can work with it.
- Scrape the sides of the bowl with a spatula and transfer the ball of dough onto a large working surface lightly dusted with tapioca starch. Roll the dough into a smooth ball and slice it into two equal portions with a dough cutter or knife.
- Then roll out each piece of dough into two 1-inch thick logs. Cut each log into 15 equal pieces at 1 inch wide.
- Gently roll a piece of dough into a ball - don't be too rough or the ball will break apart. After rolling the first ball, place it onto one parchment paper square and as you roll the next ball quickly stick it the first ball, until you have 5 balls per donut to create a circular ring shape. Repeat this process until you have have 6 donuts. (Do not roll all 30 balls all at once or they won't stick as easily to create the donut).
- Heat 2 cups or 500 ml of vegetable oil in a large heavy bottomed pan on medium heat or until 375 degrees F with a digital instant read thermometer. If you don’t own a thermometer, insert a wooden utensil into the oil and check for bubbles.
- Once the oil is hot, carefully lower one donut with the parchment paper underneath into the hot oil using a slotted spoon or spatula. Ensure the donut is fully submerged into the oil.
- Fry the donut for 20 seconds and then slowly remove the parchment paper square with kitchen tweezers or tongs discarding it.
- Deep fry the donut in the center of the pan for 3-4 minutes in total until golden brown, carefully flipping over halfway. Repeat this process for remaining donuts and fry one at a time.
- Remove and transfer the fried donut onto a wire rack or paper towel lined plate to remove excess oil and to cool down completely.
- To make the glaze, in a small bowl whisk together powdered icing sugar with 1 tablespoon or 15 ml milk and food coloring. Dip the donuts round side up into the glaze, dripping off excess glaze.
- Then transfer glazed donuts (glazed side up) to a wire rack resting on top of a large baking sheet. Quickly add ½ teaspoon sprinkles to each donut while the glaze is still wet. Enjoy!


Shannel
I was wondering if you can you any other oil other then avocado oil??
christieathome
Yes any neutral oil.
Jessica
Can I bake these instead and for how long?
christieathome
Unfortunately I would not suggest baking them as they come out rock hard due to the glutinous rice flour. I've tried it myself. But if you really want to test it out, you can attempt to bake it for 20-25 minutes at 350 degrees F and keep checking them until you achieve a golden brown colour on the outside and a soft chewy texture on the inside.
Christie
Em
Hi, can I use whole milk instead of oat?
christieathome
Yes whole milk works well too! I hope you enjoy my recipe.
Linda
These were delicious! So chewy and I loved how simple the frosting was. Can't wait to make it again.
Rosemary
I love that you added pictures of how these are made within the recipe! When I first looked I thought they would be piped out! Now I'm debating making doughnuts as a snack today hehee
christieathome
Thanks so much Rosemary! I hope you get a chance to make some donuts today!
Theresa
If I dont have a microwave, what can I do to get the same reault for the starter dough? I'm thinking I could steam it but I don't know for how long...
christieathome
You'll have to steam it long enough so that it becomes one colour and the texture becomes a tacky dough. I would estimate anywhere between 5-10 minutes, checking every now and then with a chopstick.
Sherri
These are such beautiful donuts! My girls would really enjoy making and eating these. I love that you included the instructional photos for the steps too which is super helpful.
christieathome
Thanks so much Sherri! I'm so glad I could share the detailed photos and I hope you and the girls get to make them 🙂