

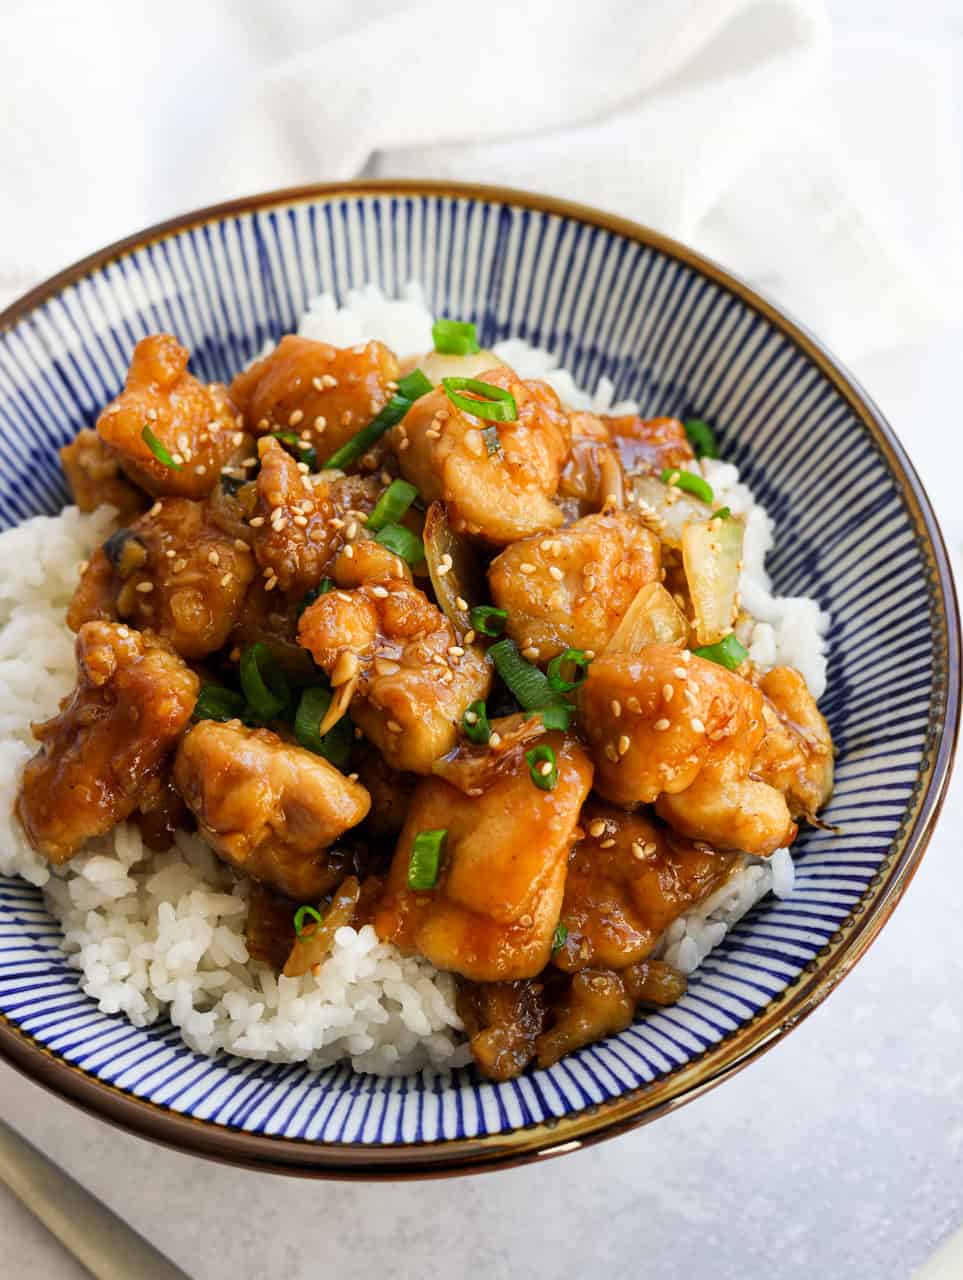
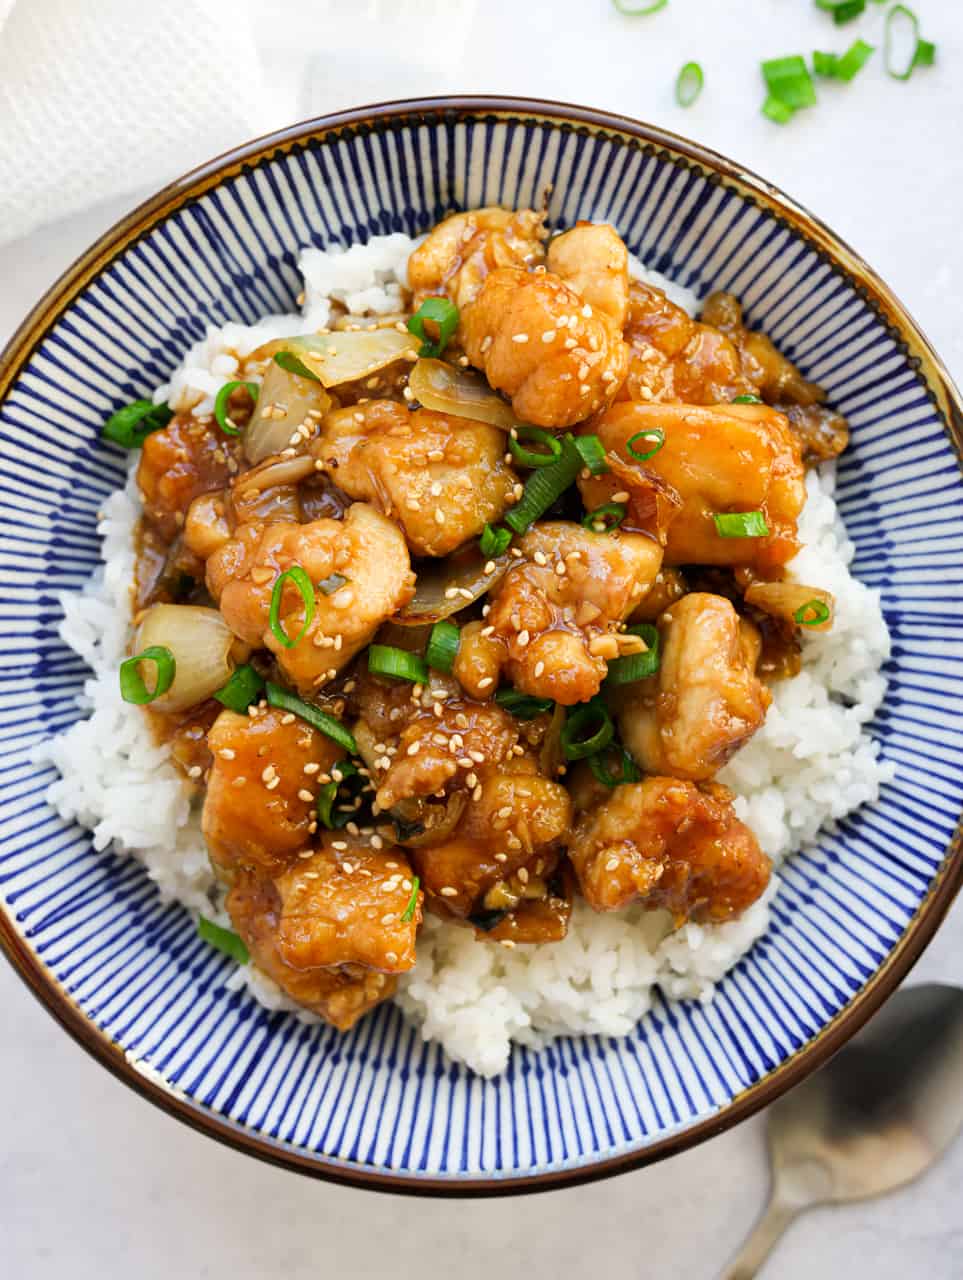
Crispy fried chicken coated in a sweet, savory sesame sauce with aromatic onions. This easy sweet sticky Korean chicken recipe is ready in 30 minutes with simple ingredients. It's a family-friendly weeknight dinner with crispy texture and sticky, takeout-style flavor.
Jump to:
This Korean-inspired chicken dish came from my bulgogi recipe because I wanted crispy chicken tossed in that same sweet, savory sesame sauce. I purposely kept this chicken mild for myself and anyone with a low tolerance for spice, including kids.
During testing, I found that coating the chicken well in cornstarch and letting it fry untouched until the first side is golden and crisp before flipping gives it a crunchy crust without needing a lot of oil.
Why It Works
- Light cornstarch crust: Creates a crisp coating without the heaviness of a wet batter.
- Controlled frying heat: A heavy-bottomed pan and small batches help keep the oil at 325-350°F for even, crisp frying.
- Quick final toss: Coating the chicken right before serving helps the crust stay crisp longer.
Ingredients & Substitutes
Exact ingredient amounts are listed in the recipe card at the bottom of this page.
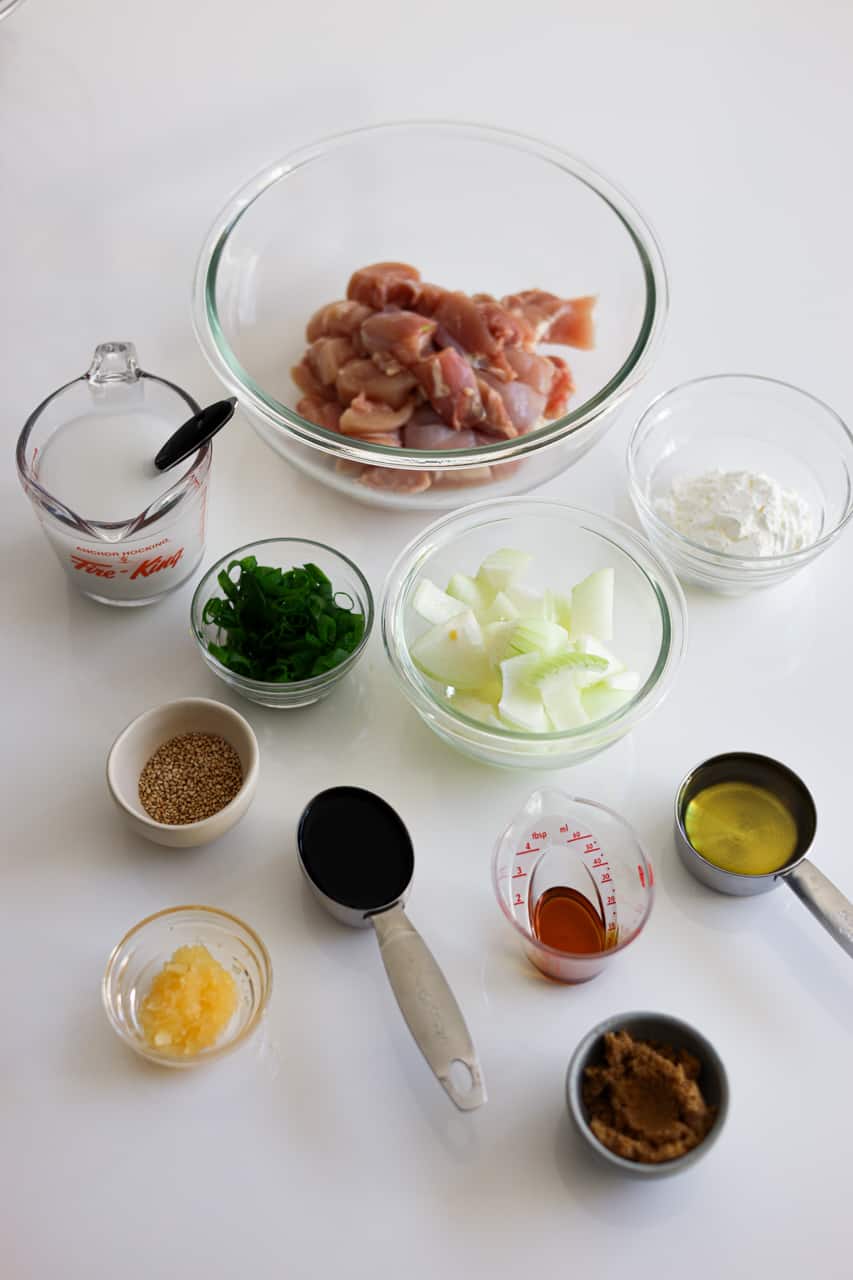
- Skinless Boneless Chicken Thighs: Chicken breasts also work, but they're leaner and can dry out more easily.
- Cornstarch: Potato starch works too. Avoid tapioca or arrowroot starch because the coated chicken can stick together while frying.
- Onion: White or yellow onion works.
- Vegetable Oil: Choose a neutral, high-smoke-point oil for frying. Canola or refined avocado oil works too.
- Green Onions
Sauce
- Regular Soy Sauce: Light soy sauce also works. Use low-sodium soy sauce for a less salty sauce.
- Brown Sugar: I prefer light brown sugar, but dark brown sugar works too.
- Garlic: Fresh garlic gives the best flavor, but jarred minced garlic also works.
- Plain Liquid Honey
- Toasted Sesame Seeds
- Toasted Sesame Oil
- Cornstarch: Thickens the sauce so it clings to the chicken. Potato or tapioca starch also works.
- Cold Water
- Green Onion
Note: Asian ingredients are typically available at most Asian grocery stores or online.
Expert Tips
- Press on the cornstarch for a rougher coating that fries up extra crisp.
- Shake off loose cornstarch to keep it from burning in the oil.
- Fry right after coating so the cornstarch stays dry and crisp.
Instructions
Below are step-by-step instructions on how to make sweet sticky Korean chicken:
- Make the sauce: Whisk together all the sauce ingredients in a small bowl until the sugar dissolves. Set aside.
- Prepare the chicken: Dice the chicken thighs into even 1.5-inch pieces. Don't pat them dry; the natural surface moisture helps the cornstarch stick.
- Coat the chicken: Place the chicken in a large bowl, add the cornstarch, and toss until evenly coated. Add 1-2 tablespoons more cornstarch if any areas remain uncoated.
- Fry the chicken: Heat the oil in a large, heavy-bottomed pan over medium-high heat to 350°F. Fry the chicken in small batches for 5-7 minutes total, keeping the oil between 325-350°F. Don't move the chicken until the bottom is golden and crisp, then flip and fry until the chicken reaches 165°F. Between batches, return the oil to 350°F and remove any browned bits. Transfer to a wire rack to drain.
- Cook the onions: Remove the remaining oil from the pan, leaving 2 teaspoons. Add the chopped onions and cook for about 1 minute until crisp-tender.
- Simmer the sauce: Whisk the sauce again, then pour it into the pan. Simmer for 30-45 seconds until the sauce thickens enough to coat the back of a spoon.
- Coat the chicken: Add the fried chicken and toss until evenly coated in the sauce. Garnish with green onions, remove from the heat, and serve immediately.
Air Fryer Method
- Lightly spray the air fryer basket and coated chicken with oil. Air fry in a single layer at 400°F for 10-14 minutes until golden and crispy and the chicken reaches 165°F; no flipping is required. Cook in batches as needed.
- Cook the onions in 2 teaspoons oil for 1 minute, then whisk the sauce again and pour it into the pan. Simmer for 30–45 seconds until thick enough to coat the back of a spoon.
Variations
- Gluten-free option: Replace the soy sauce with tamari or gluten-free soy sauce.
- Spicy version: Mix 1 teaspoon gochugaru into the sauce for extra heat.
Pairing Suggestions
Serve sweet sticky Korean chicken with:
Steamed Rice: Soaks up the sweet, savory sauce.
Korean Bean Sprout Salad: Adds a light, crunchy contrast.
Korean Scallion Pancake: Adds a savory, crispy starter.
Storage & Reheating
- Refrigerator: If possible, store the chicken and sauce separately in airtight containers for up to 3 days to help keep the chicken crisp.
- Freezer: If possible, freeze the chicken and sauce separately for up to 2 months. Thaw overnight in the refrigerator; the coating will be less crisp after freezing.
- Reheating: For chicken stored separately, air fry at 350°F for 5 minutes or bake at 400°F for 8 minutes. Warm the sauce over low heat with a splash of water, then toss together. For sauced chicken, air fry at 350°F for 8 minutes or bake at 400°F for 12 minutes.
FAQ
The oil may be too cool or the pan overcrowded. Keep the oil at 325-350°F, fry in small batches, and cook the chicken immediately after coating.
The chicken needs some surface moisture for the cornstarch to stick, but it shouldn't be dripping wet. Once in the oil, leave the chicken untouched until the bottom is golden and crisp before flipping.
The cornstarch may have settled or the sauce needs more time to simmer. Whisk the sauce again before adding it to the pan, then simmer until thick enough to coat the back of a spoon.
More Like This
Check out my other fried chicken recipes:
📖 Recipe
Easy Sweet Sticky Korean Chicken (30 Minutes)

Ingredients
- 6 skinless boneless chicken thighs
- ¼ cup cornstarch
- 1 small onion diced
- ⅓ cup vegetable oil or any neutral oil
- 1 green onion finely chopped
Sauce
- 4 ½ tablespoon regular soy sauce or light soy sauce
- 3 ½ tablespoon brown sugar
- 3 garlic cloves minced
- 1 tablespoon honey
- 1 tablespoon sesame seeds
- ½ tablespoon sesame oil
- 1 tablespoon cornstarch
- 1 cup water cold
- 1 green onion finely chopped
Instructions
- Whisk together all the sauce ingredients in a small bowl until the sugar dissolves. Set aside.
- Dice the chicken thighs into even 1.5-inch pieces. Don't pat them dry; the natural surface moisture helps the cornstarch stick.
- Place the chicken in a large bowl, add the cornstarch, and toss until evenly coated. Add 1-2 tablespoons more cornstarch if any areas remain uncoated.
- Heat the oil in a large, heavy-bottomed pan over medium-high heat to 350°F. Fry the chicken in small batches for 5-7 minutes total, keeping the oil between 325-350°F. Don't move the chicken until the bottom is golden and crisp, then flip and fry until the chicken reaches 165°F. Between batches, return the oil to 350°F and remove any browned bits. Transfer to a wire rack to drain.
- Remove the remaining oil from the pan, leaving 2 teaspoons. Add the chopped onions and cook for about 1 minute until crisp-tender.
- Whisk the sauce again, then pour it into the pan. Simmer for 30-45 seconds until the sauce thickens enough to coat the back of a spoon.
- Add the fried chicken and toss until evenly coated in the sauce. Garnish with green onions, remove from the heat, and serve immediately.
Peanut
This is one of my favourite go to family weeknight dinner recipes, everyone eats it and it’s so quick to make.
Christie Lai
Thank you so much for making my recipe and I appreciate this kind review! So glad it's become a family favorite!
Lyra Cicala-Maestre
First time making Sweet Sticky Korean Chicken, took me longer to prep and cook but worth it! My wife really enjoyed the dish and so did it, we will definitely be using this recipe in the future! I love the flavour, it’s sweet, as the name suggests, but not too sweet which is perfect for us! I’ll definitely be coming back to this site to try out other Korean recipes. Thank you for sharing it!
Christie Lai
I am so happy to read this comment! Thanks so much for making it and so glad you and your wife really enjoyed it 🙂
Luhan Strydom
Wow. First time making this ofcourse. I overcooked some of my chicken a little bit. But furthermore I loved it. Loved every second of making this awesome Korean sticky chicken. I am in love with your recipes and wish I could take Korean food classes to learn all this amazing food. Thank you so much.
Christie Lai
Thank you so much for making my recipe and for sharing your positive experience with us! So glad you enjoyed it!
Leslie
This was a complete hit. I have to tell you I did add a squirt of siracha to the sauce and it was delicious. I made a lot of chicken so I doubled the sauce and I honestly think I will triple it next time. SO GOOD, thank you for sharing!!!
Christie Lai
Thank you so much for the kind words and for making my recipe! I'm so glad it was a hit and yum sriracha sauce sounds amazing!
Laura
Made this tonight and it was delicious and so easy!!
Didn’t have a wok so we used a 3-qt enameled Dutch oven on our stovetop and it worked well! Thank you for the recipe :):)
christieathome
I am so glad you enjoyed it Laura and thank you so much for making my recipe! Happy it also worked out with the dutch oven 🙂
ash
super easy, took me only like ten minutes longer than it says... could've been because my twins woke up :]
christieathome
Thanks for making my recipe and glad you enjoyed it!
Sarah
Made it even faster using chicken tenders in the air fryer, and just making the sauce and tossing it together. My picky toddlers loved it! Thanks!
christieathome
So thrilled to read this, Sarah! Glad it worked for the whole family with chicken tenders 🙂
janet
Thank you for this recipe. My son was born in South Korea 29 years ago and we adopted him at 4 months old. We had access to a lot of Korean culture, food, events when we lived in Long Island but we moved to Vermont 23 years ago and it is as you probably know a very white, non-ethnic state. He loves food and asks me every day what is for supper. I was so happy to be able to make this for his birthday and even though I forgot the sesame seeds it was delicious. So happy to have found you. Janet
christieathome
Thank you so much for sharing this wonderful story with me Janet! I am really happy to hear my website could help you recreate Korean food at home for your adopted son. This is music to my ears 🙂
Denisse
This recipe has become a family dinner staple. It’s hard for me to make my boy try new things (he has autism) so when I find meals he likes that are so good and the entire family will enjoy I most definitely keep it. I make this recipe often and tonight was another successful dinner night. I normally add snow peas, bell peppers, and Serrano peppers to include vegetable intake and they work perfectly with this recipe.
christieathome
Thank you so much for sharing this comment with me, Denisse! I am really glad I could help provide this recipe so your son can try new things 🙂 I love the additions to help balance it out! Have a lovely day!
Erica
Delicious I don't have a wok but a big pan with high sides was ok...also didn't have onion so left it out and it was still tasty! I paired it with a Korean style slaw and white rice. Will 100% make it again....and again...and again
christieathome
Thanks so much for making my recipe! So glad you enjoyed it!
Jeff
Hi could you tell me what is regular soya sauce I have only seen light or dark soya sauce
christieathome
Hi Jeff, it's just your normal soy sauce without the label of light or dark soy sauce. It's thin in viscosity and not thick in texture.Please click here for a direct link to the one I used regularly.
Kimi
I don’t have a Wok, would a regular frying pan be ok?
christieathome
Yes absolutely!
Laura
Hi, I'm hoping to make this tomorrow. I have chicken breasts that I was going to use instead of thighs since that's what I have in the house. I was wondering how many pounds of chicken you used. Thanks!
christieathome
Hi there, sorry for the late reply! I would recommend using 3 large chicken breasts in replacement of the thighs.
Samantha
Followed it exactly and it was delicious! Will make again 🙂
christieathome
I am really happy to read this! Thank you so much for making my recipe Samantha! 🙂
Cheryl
Absolutely delicious. A firm family favourite x
christieathome
I am so glad to hear that you enjoyed this! Thank you so much for making my recipe ☺️
Brenda
Wow this was scrumptious. It will become a weekly staple for me and my family.