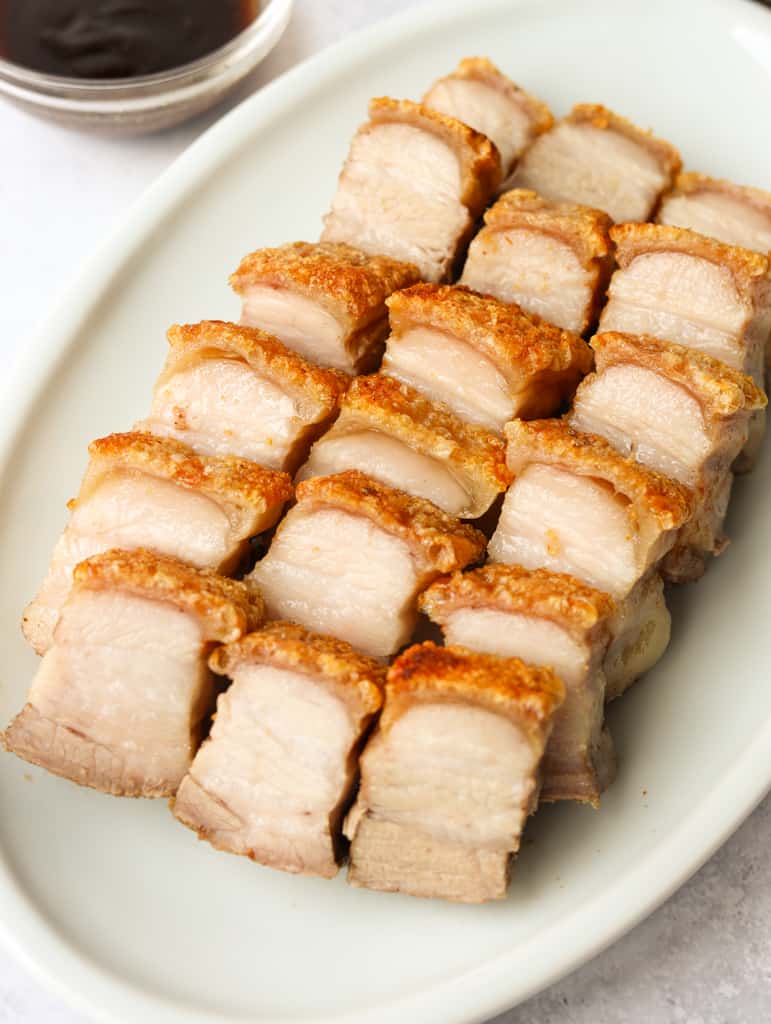
Juicy pork belly seasoned with a Chinese five spice rub with crispy crackled skin and a perfect fat to meat ratio! This easy Chinese Roast Pork Belly is made with simple ingredients and it's restaurant quality, saving you money! A great main dish.

Jump to:
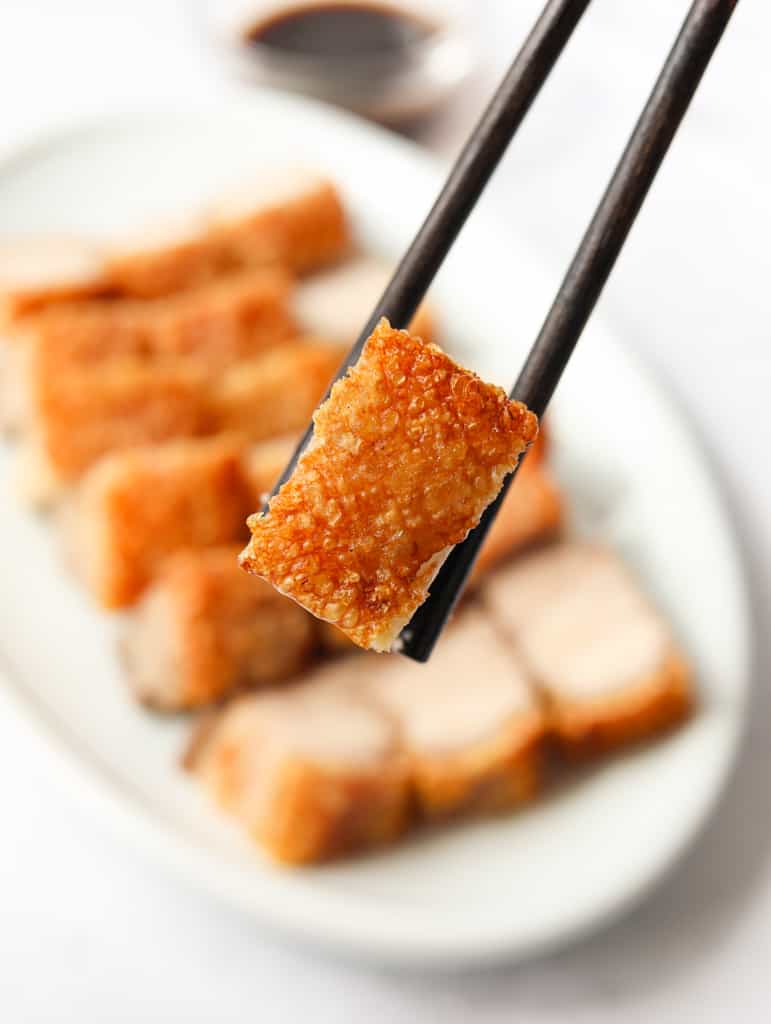
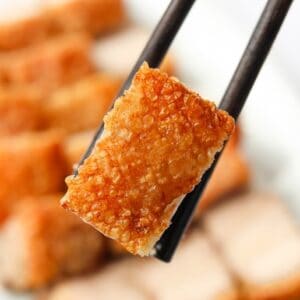
Crispy Chinese style pork belly (or 'Siew Yoke' or 'Siu Yook' in Cantonese) is made of a slab of pork belly seasoned with Chinese five spice powder, garlic powder and salt and roasted for that crispy crackling skin.
The taste of the crackled skin with the tender pork with a hint of fat is heavenly, thanks to the contrasting textures. It's best enjoyed for dinner, lunch with steamed rice and vegetables.
It's a popular dish at Chinese restaurants and found on the menu along side of char siu pork (Chinese BBQ pork), roasted duck, soy sauce chicken and other Chinese barbecue meat dishes!
The cooked meat can also be repurposed for other meals, like fried rice, noodles, soup noodles, or in baos or buns. It's very versatile!
Chinese roast pork is usually enjoyed on Chinese New Year or at Chinese weddings to bring wealth, good fortune and strength!
My Chinese roast pork recipe is easy because unlike others, it doesn't need a heavy salt crust and you won't need to dry out the skin the night before in the fridge due to the vinegar and scoring techniques.
Ingredients & Substitutes
Please scroll down to below recipe card for exact measurements.
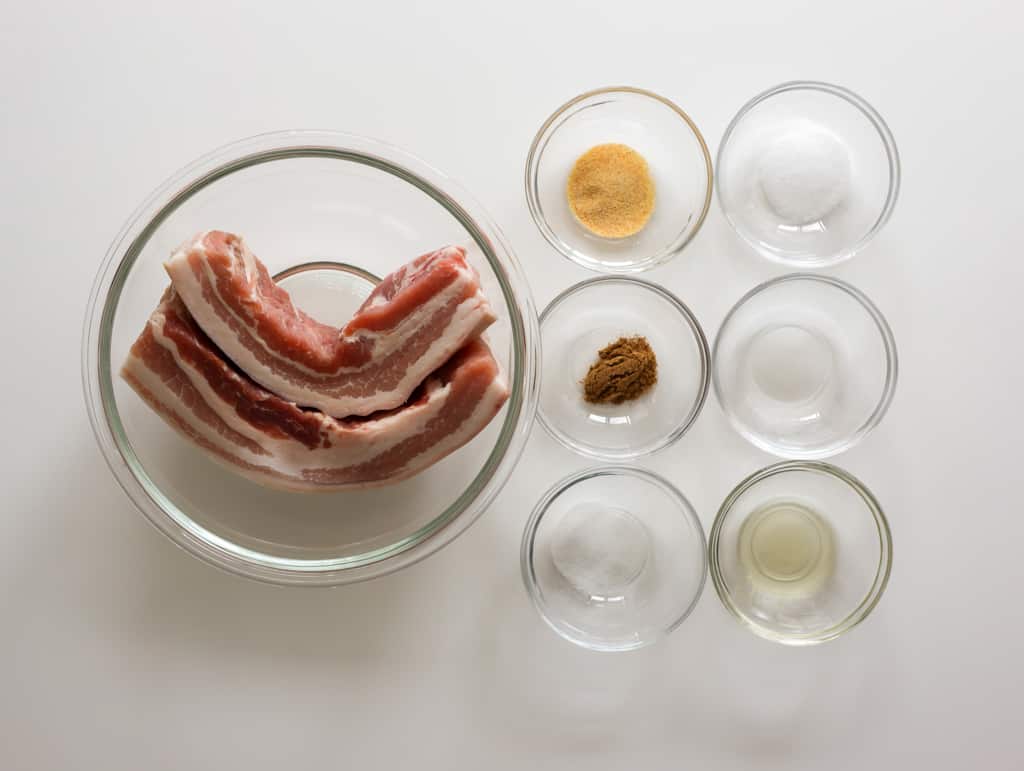
- Skin-On Pork Belly: ideally boneless and the skin should be ideally 3-4 mm thick. Each slab should be around 2-inch wide 9-inch long or buy a large slab and cut it into the same dimensions by yourself or a butcher. Important: Do not use thinly sliced pork belly strips or substituting with other cuts of pork for this recipe.
- White Vinegar: this is the best vinegar to help dry out the pork skin. I don't recommend substituting with other vinegars as this hasn't been tested with substitutes.
- Salt: sea salt or table salt to draw moisture out from the skin.
- Neutral oil: like avocado oil, sunflower oil, grapeseed oil, peanut oil, vegetable oil or canola oil with a high smoke point. Avoid olive oil that has a low smoke point.
Dry Rub Mixture
- Chinese Five Spice Powder: a ground powder mixture of star anise, cinnamon, Sichuan peppercorns and cloves. Most grocery stores or online retailers sell this. Do not substitute with all spice powder because it contains nutmeg.
- Garlic Powder
- Salt
Optional Serving Sauce
- Hoisin Sauce: a thick brown sauce that is sweet with molasses. You can find this at most Asian grocery stores.
- White Vinegar: or substitute with rice vinegar or apple cider vinegar to dry out the skin.
Note: Most Asian grocers will carry these ingredients. You may find some at your select grocery store or online, like on Amazon.
Equipment
- 2 large pieces aluminum foil
- Clean paper towels
- Cooking brush
- Sharp paring knife, utility knife with a pointy tip or a clean utility razor blade
- Baking sheet
Expert Tips
- Source fresh quality pork belly strips with a thick top layer of skin so you can score it. Avoid using thinly sliced pork belly.
- Wipe the skin clean of any dry rub and excess moisture with a clean paper towel so the skin is very dry.
- Use a sharp paring knife or a small utility knife or clean razor blade to make tiny cross hatches into the skin. This is the best method for crackled skin. I recommend this over the other method of poking holes.
- Wrap the foil around the meat part only creating low walls and leave the skin exposed so the heat can roast the skin to make it crackled. Tall walls will result in non-crispy skin.
- Roast the pork on the second lowest wire rack for the first roasting process and move it to the lowest position away from the heat for the crackling process for tender meat and crackled skin.
Instructions
Below are step-by-step instructions on how to make Chinese roast pork belly:
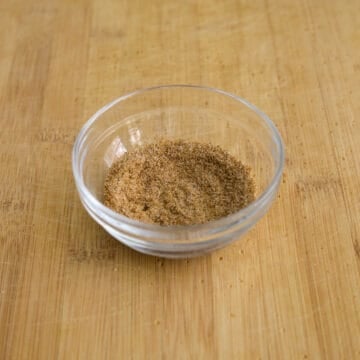
- In a small bowl, combine dry rub mixture ingredients as listed above and set aside.

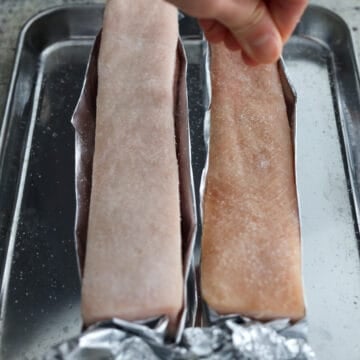
- Pre-heat the oven to 225 degrees F. If needed, cut boneless pork belly lengthwise into 2-inch wide x 9-long strips. Trim off any uneven meat from the bottom to create a levelled strip. Pluck out any hairs on the skin with clean tweezers.
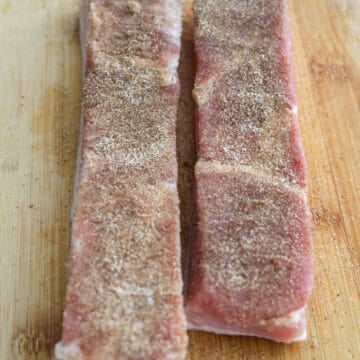
- Turn the pork belly meat side up and evenly season with the dry rub mixture patting it into the meat.
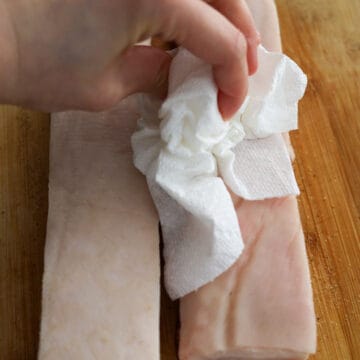
- Then turn the pork belly over skin side up and wipe it with a clean paper towel to remove any dry rub or excess moisture as best as possible.
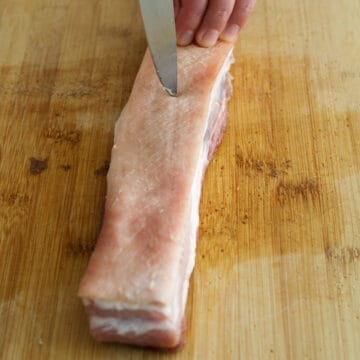
- With the pointy tip of a sharp paring knife or a clean scoring blade, carefully and lightly score as many tiny cross hatches into the thick skin. Do not pierce the skin.
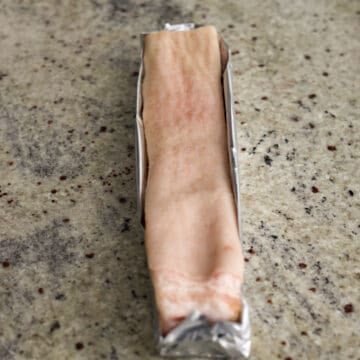
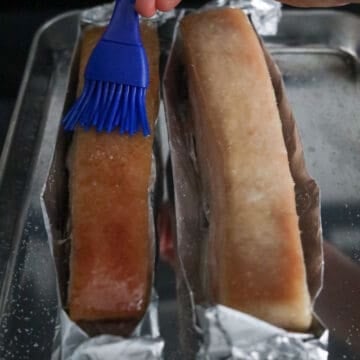
- Then place pork belly strips onto a large rectangular sheet of aluminum foil. Wrap the foil around the pork belly strip creating a rectangular box with low walls, so the skin is fully exposed. Do not create tall walls or it will block the heat from crisping the skin. Transfer the wrapped pork to a small baking sheet.
- Lightly brush the skin with vinegar and do not drench it. Next generously sprinkle enough salt on top of the skin.

- Bake in the oven on the second lowest oven rack for 60 minutes, until skin is dry and slightly hard to touch.
- Remove the pork belly from oven. Feel free to leave the salt on for taste or brush off the excess. Then lightly brush the skin only with a layer of vegetable oil or any neutral oil.
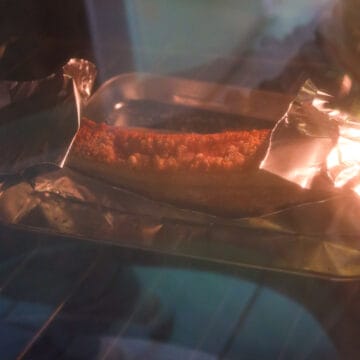
- Then pre-heat the oven to 500 F. Place pork belly back into the oven on lowest roasting rack. Broil for 12-15 minutes until the skin is golden brown and crackled. Closely monitor to prevent burning. If needed, place small sheets of aluminum foil over areas that are starting to brown faster to prevent burning.

- Remove the cooked pork from the oven and rest for 10-15 minutes inside the aluminum boxes off the baking sheet to let the juices redistribute.
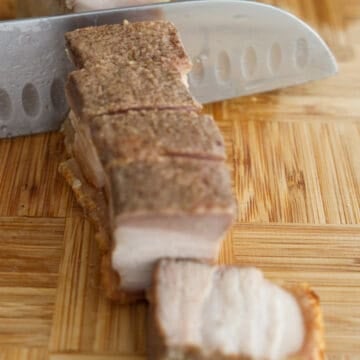
- Turn the pork belly skin side down on a cutting board. With a sharp knife, slice into the meaty side in a sawing motion. Then when you reach the skin, slice down with one swift chop. In a small bowl, combine hoisin and rice vinegar. Serve with pork belly slices.
Storage
- Leftovers will last up to 5 days stored in an airtight container in the refrigerator. To reheat: reheat in the oven for 350 F for 5-10 minutes until hot or microwave for 2-3 minutes but the skin will be soggy.
- Freezer friendly? Chinese roast pork belly can be frozen for up to 1 month. To freeze: let the cooked pork cool down and wrap in plastic wrap to store inside a freezer-safe bag. To enjoy, thaw it overnight in the fridge and reheat in the oven for 350 F for 5-10 minutes until hot or microwave for 2-3 minutes but the skin will be soggy.
Pairing Suggestions
Chinese roast pork belly serves well with:
- condiments like hoisin sauce mixed with vinegar or yellow mustard sauce
- starters like egg rolls, crab rangoons, egg drop soup, hot and sour soup
- white or brown rice, cauliflower rice, or fried rice
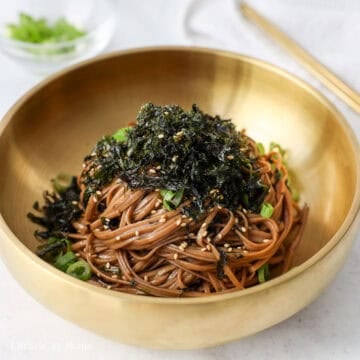
- chow mein, lo mein, plain noodles, soup noodles, or dry wonton noodles
- cooked vegetables like bok choy, spicy garlic bok choy, choy sum, gai lan, garlic green beans or stir fried snow pea leaves.
- protein dishes like Soy Sauce Chicken, Oven-Roasted Char Siu or Air Fryer Char Siu
- inside baos or steamed buns
Other Ways to Use Roast Pork Belly
If you happen to have leftover pork belly, you can use it in:
- fried rice
- noodle stir fries
- Inside a fluffy milk bao with hoisin sauce and pickled veggies
- soups
FAQ
Chinese roast pork belly can be made up to 5 days in advance and stored in an airtight container in the fridge. To reheat, microwave or in a pan on the stovetop on medium heat.
Instead of scoring the skin, you may poke as many holes into the skin as possible with metal skewers or this needling tool. However, this will require a longer time in the oven to bubble and crack (up to 25-30 minutes) so I highly recommend using the scoring method instead.
I recommend using a traditional or conventional oven to roast the pork for best results because this recipe has not been tested in the air fryer or convectional oven (aka toaster oven).
📖 Recipe
Best & Easiest Chinese Roast Pork Belly
Ingredients
- 1.5 lb pork belly skin-on, boneless
- ¼ teaspoon white vinegar
- ½ teaspoon salt
- ½ teaspoon vegetable oil or any neutral oil
Dry Rub Mixture
- ½ teaspoon Chinese five spice
- ½ teaspoon garlic powder
- ½ teaspoon salt
Serving Sauce (optional):
- ¼ cup hoisin sauce
- 2 tsp white vinegar or rice vinegar or apple cider vinegar
Instructions
- In a small bowl, combine dry rub mixture ingredients as listed above and set aside.
- Pre-heat the oven to 225 degrees F.
- If needed, cut boneless pork belly lengthwise into 2-inch wide x 9-long strips. Trim off any uneven meat from the bottom to create a levelled strip. Pluck out any hairs on the skin with clean tweezers.
- Turn the pork belly meat side up and evenly season with the dry rub mixture patting it into the meat. Then turn the pork belly over skin side up and wipe it with a clean paper towel to remove any dry rub or excess moisture as best as possible.
- With the pointy tip of a sharp paring knife or a clean scoring blade, carefully and lightly score as many tiny cross hatches into the thick skin. Do not pierce the skin.
- Then place pork belly strips onto a large rectangular sheet of aluminum foil. Wrap the foil around the pork belly strip creating a rectangular box with low walls, so the skin is fully exposed. Do not create tall walls or it will block the heat from crisping the skin. Transfer the wrapped pork to a small baking sheet.
- Lightly brush the skin with vinegar and do not drench it. Next generously sprinkle enough salt on top of the skin.
- Bake in the oven on the second lowest oven rack for 60 minutes, until skin is dry and slightly hard to touch.
- Remove the pork belly from oven. Feel free to leave the salt on for taste or brush off the excess. Then lightly brush the skin only with a layer of vegetable oil or any neutral oil.
- Then pre-heat the oven to 500 F. Place pork belly back into the oven on lowest roasting rack. Broil for 12-15 minutes until the skin is golden brown and crackled. Closely monitor to prevent burning. If needed, place small sheets of aluminum foil over areas that are starting to brown faster to prevent burning.
- Remove the cooked pork from the oven and rest for 10-15 minutes inside the aluminum boxes off the baking sheet to let the juices redistribute.
- Turn the pork belly skin side down on a cutting board. With a sharp knife, slice into the meaty side in a sawing motion. Then when you reach the skin, slice down with one swift chop.
- In a small bowl, combine hoisin and rice vinegar. Serve with pork belly slices.


Lie Giok Hoa
Wonderful news impressive.. l’ll my best n make it by pleasure n joy
Tq so much darling 👏👏👏❤️❤️❤️
Christie Lai
Thank you so much for making my recipe and so glad you liked it!
MarionT
Do we remove salt layer before brushing with oil?
Christie Lai
You can brush away the excess salt if you wish or leave it on for taste. Instructions have been updated to reflect this question. Thanks for bringing it to my attention!
Olive Mendiola
Winner!!!
christieathome
Woo hoo! Thanks for making it and glad it's a winner 🙂
Garry
Looks amazing and Im going to give it a try really soon.
Thanks Chrisitie 🙂
christieathome
Thanks so much Garry! I hope you enjoy it!
Jacqueline
Cooking it low and slow does make the meat insanely tender. I also wasn't getting the bubbled skin and after cooking it an additional half hour reverted to the broiler for 5 minutes. Perfect bubbled skin. A $1.25 solution for piercing the skin is at the local dollar store. A crafting pick.
Brenda
I will try to make this, it sounds really easy! Thank you for sharing!
christieathome
Thank you Brenda! I hope you enjoy it!
Nadeen
Simply delicious! I usually look a various recipes when making a dish I like to make it my own and find the combinations of flavors that I like. I did that and it turned out amazing. I comment because I like the tool you suggested and the foil method which I think perfected my crispy pork belly. Kudos & thank you for sharing, I and everyone loved it. Also most recipes say pork belly doesn’t reheat well but in essence it does with the invention of the Airfryer just as amazing as when it was first cooked so don’t worry about leftovers 😉
christieathome
Thanks so much for making my recipe Nadeen! I'm so thrilled to hear that this worked out amazing for you! Happy that everyone loved it and glad it reheated well in the air fryer!
Perla
Is it in the centre of the oven for 1 hour or the lowest part of the oven and then 40 minutes in the higher in the oven
Thanks
paul
Hi, my 'Shao Rou' skin didn't turn up creapy as expected, it never have the bubbly effect on it, is it I should pock deeper on the skin layer?
christieathome
Yes, poking deeply helps and also poking as many holes as possible. It's important to note that the skin must be very dry as well. Any moisture will cause for the skin not to be crispy.
Tanya
Absolutely amaaazing!! Best crispy skin pork ever!
Thankyou so much for sharing : )
christieathome
Thank you so much for making my recipe Tanya! I am so happy to hear it worked out well for you 🙂 Have a lovely day!
Elsa
Thanks for sharing it. Looks delicious.
Greetings,
Elsa
christieathome
Thanks so much Elsa!
Perla
Put it in the lowest part of the oven for an hour and 40 minutes in the part of the oven is that right or int middle of the oven. Thank you.
christieathome
Hi Perla, I placed it in the middle for my oven for both time periods. Just a note: I'm also using a toaster oven for this recipe but you can use a conventional oven.
Michael Chew
I would love to try your siu yuk recipe. But I am puzzled by the first 60 min roast at oven temperature of 225 F which seems low to me. In the UK this is lower than gas mark 1 which is the lowest temperature in my oven. Is this right? Thanks for your help.
christieathome
Hi Michael, thanks for your comment and question! Yes, that's correct. The meaty portion of the pork belly has to cook over low and slow for the first 60 minutes before we crank up the heat to roast the skin. I would advise using your lowest setting possible and reduce the cooking time as needed (around 40-50 minutes until your pork belly has reached in internal temperature of 200 F). Then roast the pork at 400 F just until you see bubbly crispy pork skin. I hope this helps!
Rosemary
Woahhh that crispy skin on the pork looks insane!!! And bok choy is in season here soo perfect 🙂
Sarah @ Allcookwarefind.com
Oh crispy pork, I love it!! I've eaten it at a Chinese restaurant. Just found out how to do it today.
christieathome
Yes I hope you enjoy my recipe! It's really easy!
Heidi | The Frugal Girls
This really would be fabulous served over the wet noodles. The combination of different textures is so tantalizing!
Tasia ~ two sugar bugs
The crispy skin and tender pork look like a winning combination! Thank you for all the detailed instructions!
Irma
Thank you for your recipe. We all enjoyed it especially my son
christieathome
Thank you so much for making my recipe, Irma! So happy you enjoyed it with your son 🙂