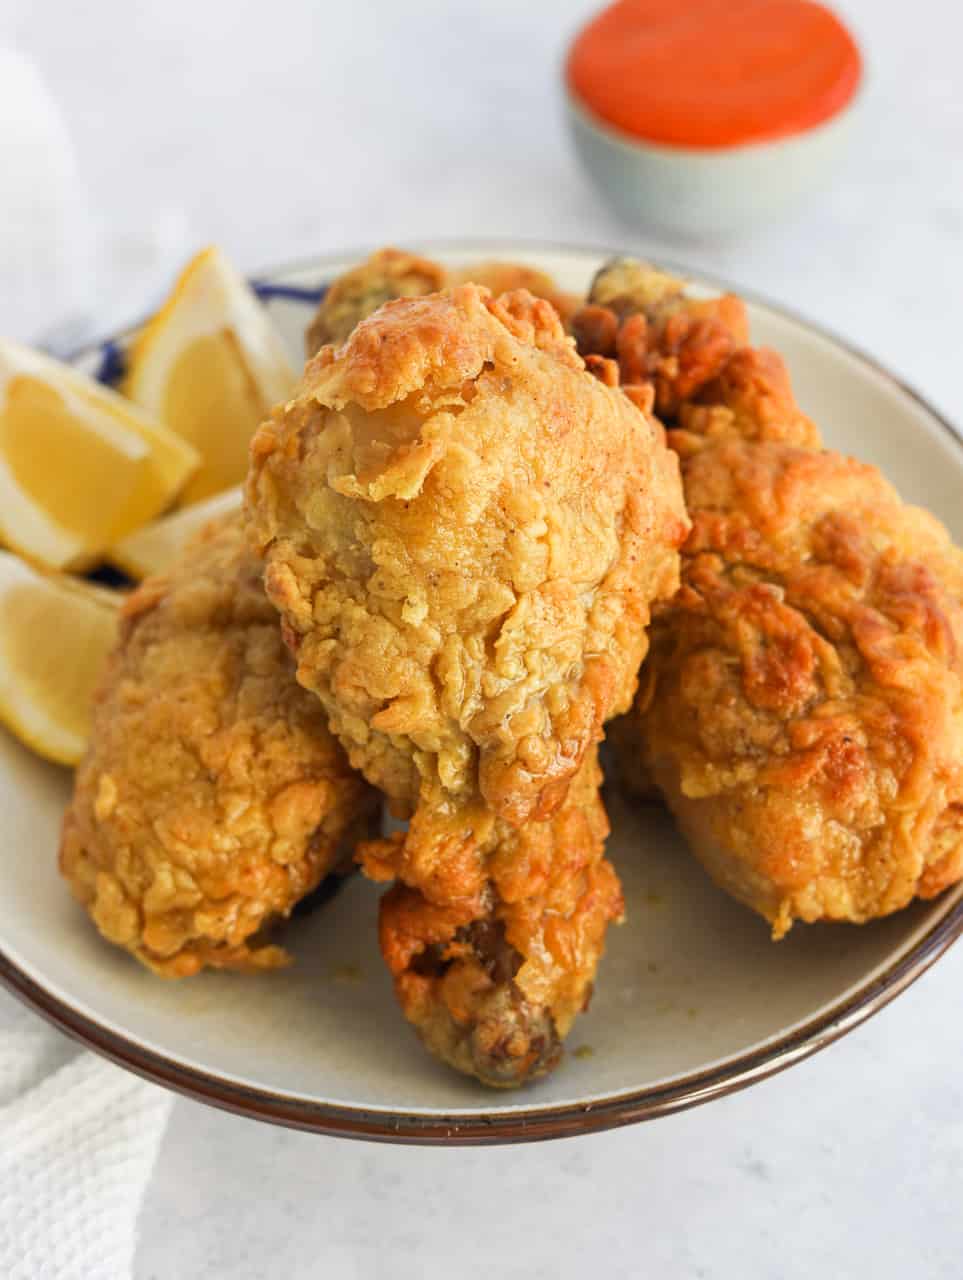
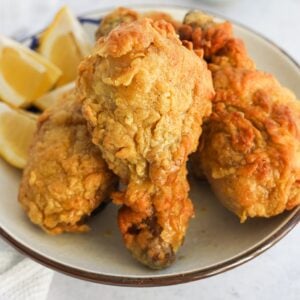
Seasoned chicken drumsticks battered and air-fried to golden, crispy perfection. This quick and easy air fryer Korean fried chicken recipe is made with simple ingredients. A delicious main dish that is family-friendly!
Jump to:
My version of Korean Fried Chicken features seasoned chicken legs dredged in a flaky coating and air-fried until crispy and golden!
Many Korean restaurants serve this dish and South-Koreans love to enjoy this with a cold beer. There are even restaurants in Korea that specialize in solely serving fried chicken!
The chicken is either served plain or with a variety of sauces to choose from, like a soy-garlic sauce or a spicy gochujang sauce.
Many historians believe that the African-American Troops from the United States taught this recipe to the Korean soldiers during the World War around Thanksgiving.
What distinguishes Korean fried chicken from the American kind is the use of curry powder, starch, double-frying, and the variety of sauces it can be served with.
Why you'll love this recipe:
- Flavorful and easily made in the air-fryer!
- Uses simple ingredients!
- Great for the family.
- It's not deep-fried, so less oil is used.
Ingredients & Substitutes
Please scroll down to below recipe card for exact measurements.
- Chicken Drumsticks (aka Chicken Legs): or substitute with bone-in skin-on chicken thighs, which will take around the same air frying time.
- Cold Water
- Neutral oil: like avocado oil, sunflower oil, grapeseed oil, peanut oil, vegetable oil or canola oil with a high smoke point. Avoid olive oil that has a low smoke point.
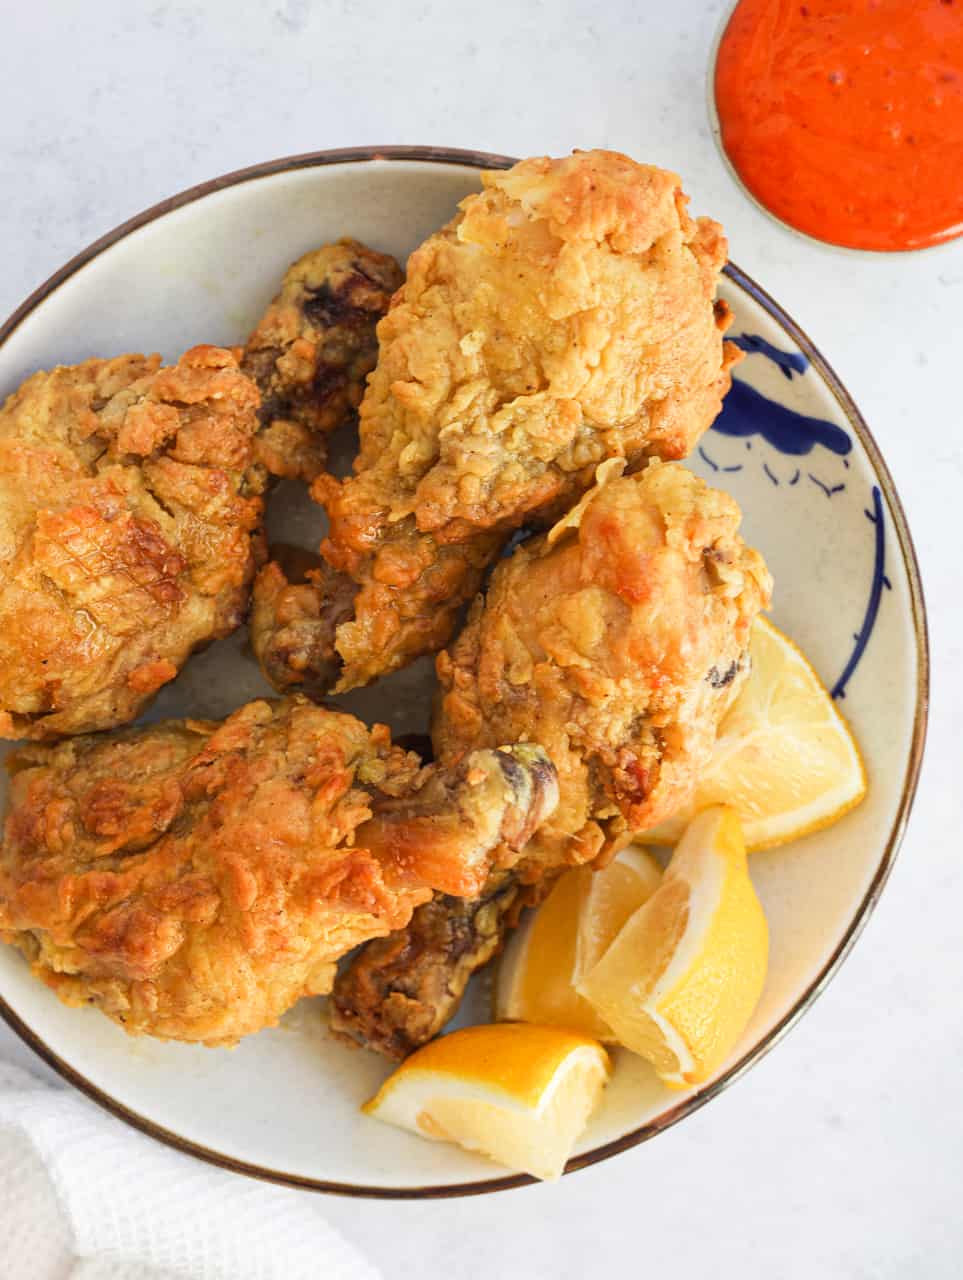
- Fresh Lemon juice: to serve with (optional)
Chicken Marinade
- White Wine: or substitute with rice vinegar or white vinegar.
- Black Pepper
- Regular Soy sauce: or substitute with low sodium soy sauce or light soy sauce.
- Garlic
- Salt
Dry Batter
- Potato Starch: or substitute with tapioca starch or cornstarch
- Onion Powder
- Garlic Powder
- Japanese Curry Powder: Japanese curry powder works best as it contains less spices. But if you only have Indian curry powder, that'll work too.
- Salt
- Black Pepper
- Baking Powder: don't skip this as it makes the crust extra crispy!
Variations
- If you’re gluten-free: substitute the soy sauce with tamari sauce, coconut aminos or a gluten-free soy sauce of your choice.
Expert Tips
- Mix the dry batter with a whisk to ensure even distribution of ingredients.
- Generously and evenly dredge the chicken ensuring no bald spots for a crispy texture.
- Evenly spray the air fryer basket with oil to prevent the crispy coating from tearing away from the chicken.
- Air fry in small batches giving each piece of chicken enough space or it can cause soggy or uncooked chicken.
- Use enough oil to spray over the chicken for a golden brown color or the chicken crust will look dry and cracked.
- Gently flip chicken with tongs and be careful not to tear away that crispy coating!
Instructions
Below are step-by-step instructions on how to make air fryer korean fried chicken:
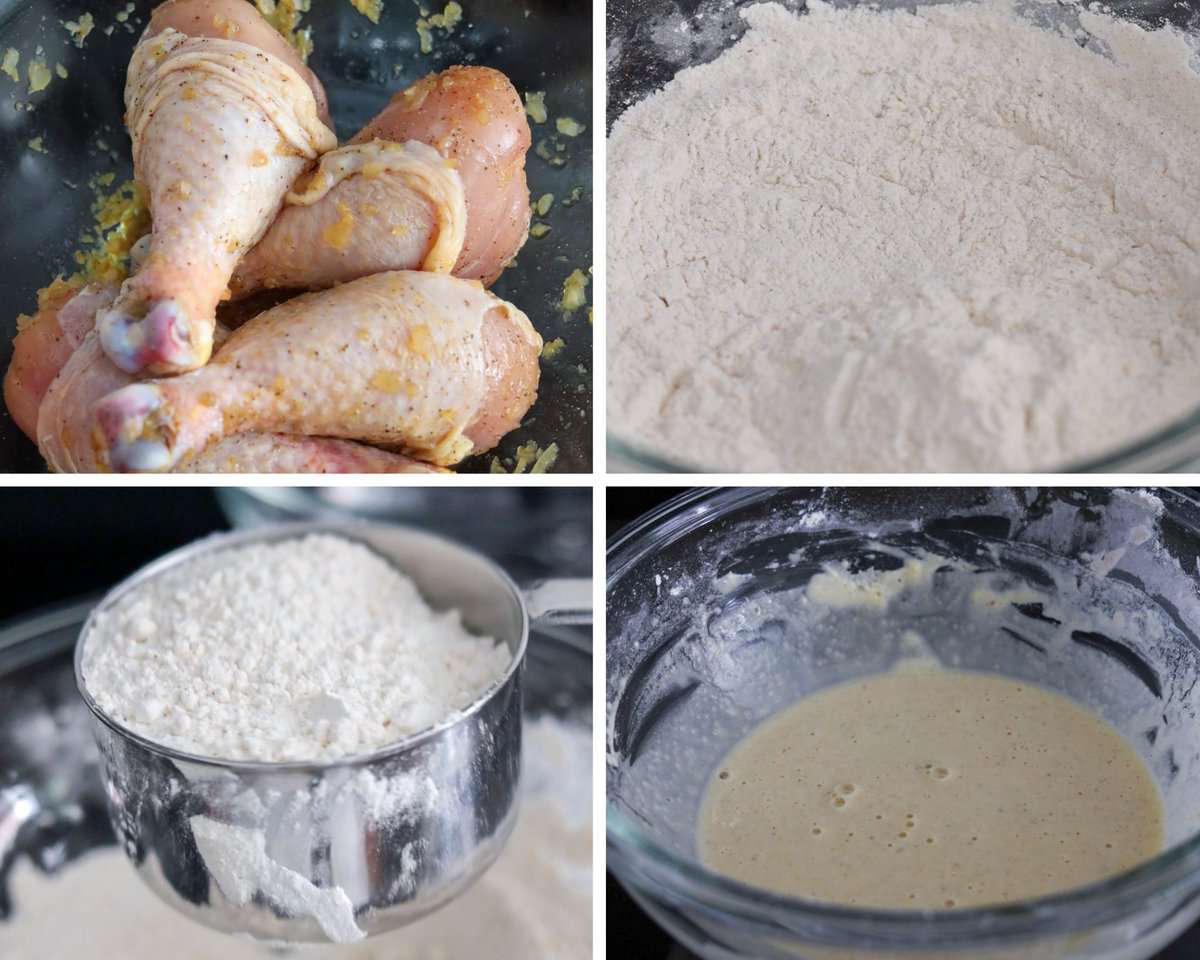
- Season chicken drumsticks with the marinade ingredients as listed above, massaging it into each piece with clean hands. Set aside to marinate for 10 minutes.
- In a large bowl, combine the dry batter ingredients and whisk well.
- Then take 1 cup of dry batter and transfer to a separate bowl and set aside.
- Then to your REMAINING dry ingredients (the bowl with less dry batter), whisk in ½ cup cold water to create a wet batter. You should now have a dry and wet batter in two separate bowls.
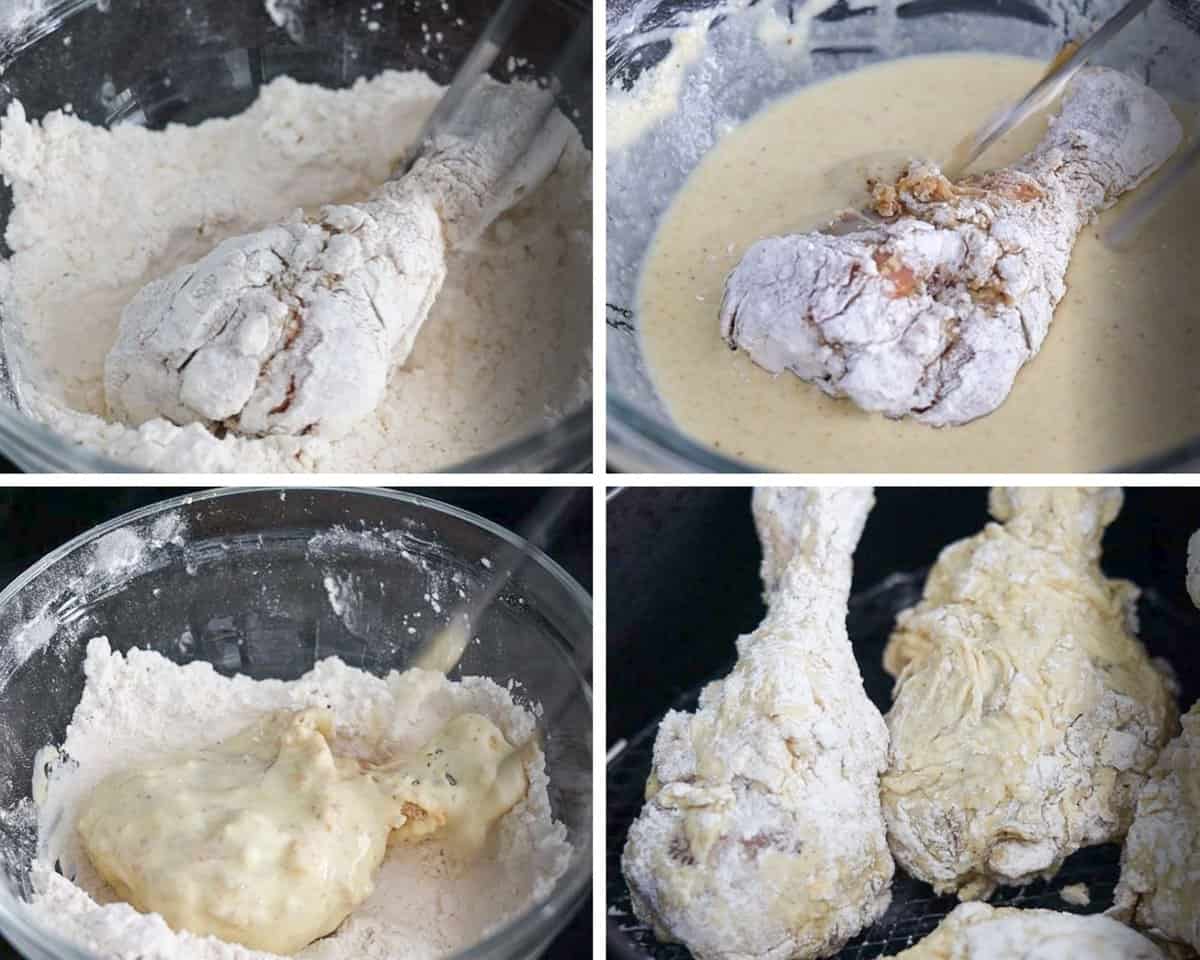
- With clean hands, evenly coat and dredge the drumsticks into dry batter first.
- Give the wet batter another whisk and dredge chicken into wet batter. If the wet batter becomes too stiff, which is normal, mix in another ¼ cup cold water to loosen it.
- Then dredge the chicken back into dry batter.
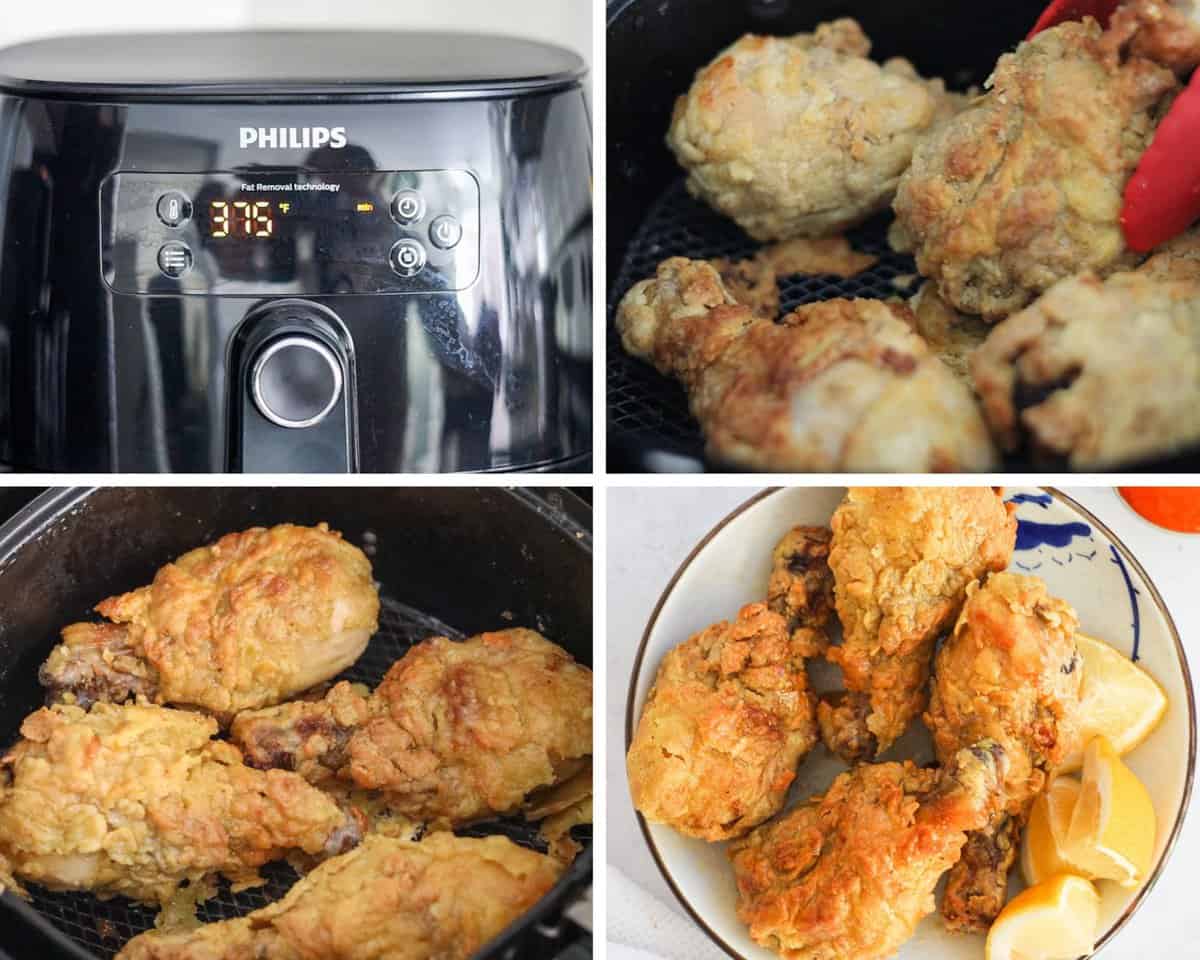
- Evenly spray the air fryer basket with vegetable oil. Place battered drumsticks into the air fryer basket giving each piece enough space. You'll need to air fry in small batches. Then generously spray vegetable oil over the chicken drumsticks. Tip: When positioning the drumsticks in the air fryer basket, angle them, so that the least amount of the chicken touches the basket as this can cause for the crispy coating to peel away.
- Air fry at 375 degrees F for 11 minutes. Then gently flip over, being careful not to remove any coating. Generously spray the drumsticks again and air fry for another 11-14 minutes until golden brown and crispy, with an internal temperature of 165°F.
- Gently remove with tongs. Serve & enjoy with fresh lemon juice!
Storage & Reheating
- Air fried Korean fried chicken will last up to 4 days stored in an airtight container in the fridge. To enjoy, reheat in microwave until hot or reheat in the air fryer at 350 degrees for 5-6 minutes or hot through out.
- Freezer-friendly? Korean fried chicken can be frozen in a freezer friendly bag, once cooled, for up to 3 months. To reheat, defrost it overnight in the fridge and reheat in the air fryer at 350 F for 5-10 minutes until hot through out.
Pairing Suggestions
Korean fried chicken serves well with:
- Spicy Tteokbokki or Rosé Tteokbokki
- Korean potato salad, pickled daikon radish, coleslaw or fresh salads.
- Korean corn cheese, onion rings, french fries, fried dumplings, or fried cheese sticks.
- Korean scallion pancake or kimchi pancake
- with steamed rice and Korean side dishes like Korean cucumber salad, beansprout salad, zucchini fritters, gamja jorim, or Korean spinach.
FAQ
Korean fried chicken can be deep fried in oil and I share full recipe, click here for that.
Other cuts of chicken, like bone-in skin-on thighs will work for this recipe and you'll need to adjust cooking time as needed.
I use the Phillips Air Fryer. I link to the exact model below in my recipe card.
📖 Recipe
Quick & Easy Air Fryer Korean Fried Chicken
Ingredients
- 6 chicken drumsticks
- ½ cup water cold
- 2-3 tablespoon vegetable oil or any neutral oil
- lemon juice to serve with chicken (optional)
Chicken Marinade:
- 1 tablespoon white wine or rice vinegar
- 3 cloves garlic minced
- 2 teaspoon regular soy sauce or light soy sauce
- ¼ teaspoon black pepper
- ½ teaspoon salt
Dry Batter:
- 1 ½ cup potato starch or tapioca starch / cornstarch
- 2 teaspoon curry powder Japanese kind recommended
- 1 teaspoon garlic powder
- 1 teaspoon baking powder
- ½ teaspoon onion powder
- ½ teaspoon salt
- ¼ teaspoon black pepper
Instructions
- Season chicken drumsticks with the marinade ingredients as listed above, massaging it into each piece with clean hands. Set aside to marinate for 10 minutes.
- In a large bowl, combine the dry batter ingredients and whisk well.
- Then take 1 cup of dry batter and transfer to a separate bowl and set aside.
- Then to your REMAINING dry ingredients (the bowl with less dry batter), whisk in ½ cup cold water to create a wet batter. You should now have a dry and wet batter in two separate bowls.
- With clean hands, evenly coat and dredge the drumsticks into dry batter first.
- Give the wet batter another whisk and dredge chicken into wet batter. If the wet batter becomes too stiff, which is normal, mix in another ¼ cup cold water to loosen it.
- Then dredge the chicken back into dry batter.
- Evenly spray the air fryer basket with vegetable oil. Place battered drumsticks into the air fryer basket giving each piece enough space. You'll need to air fry in small batches. Then generously spray vegetable oil over the chicken drumsticks. Important Tip: When positioning the drumsticks in the air fryer basket, angle them, so that the least amount of the chicken touches the basket as this can cause for the crispy coating to peel away.
- Air fry at 375 degrees F for 11 minutes. Then gently flip over, being careful not to remove any coating. Generously spray the drumsticks again and air fry for another 11-14 minutes until golden brown and crispy, with an internal temperature of 165°F.
- Gently remove with tongs. Serve & enjoy with fresh lemon juice!
Jeff Beaumont
GREAT'
Christie Lai
Thank you so much for making my recipe and for the positive review, Jeff!!!!
Erinn
Hi! I loved this recipe!! So crispy and delicious!! How do you keep the batter from sticking to the air fryer basket? I tried spraying it will oil but still didn't work? Thank you!
christieathome
Thanks so much for making my recipe, Erinn! I am so happy to hear that you enjoyed it. The first way that I recommend is to really spray the base of the basket with quite a bit of oil until it's very shiny. Another way to get around this is by placing a square piece of parchment paper on the bottom of the basket (careful not to have it touch the hot element) and place the rangoons on top giving them a spray of oil. This will prevent them from sticking to the basket but you may need to air fry for a little longer to get them crispier as the parchment paper can prevent it food from getting crispy.
Lubna
But it would be better for us if you make it without wine
Abi
Will this work without the white wine
christieathome
Yes absolutely!
Phillip
This recipe is confusing because your video on youtube includes AP flour but then your recipe here says 3 cups of cornstarch. I was excited to make this but the instructions confused me because of that. Could you please clarify? Thanks!
Christie Lai
This recipe has been updated and improved to use cornstarch or potato starch for extra crispiness but you're free to use AP flour if you wish.
Roberta
I love your recipes and this one was by far my favourite! So flavourful. I marinated mine overnight and it was just perfect. Thank you so much!
Brian
Wow wow wow. This was really good and so crispy! The instructions were detailed and clear. Definitely making this again. The whole family loved it!
Theresa Sandifer
Hi,
I didn't want to post this as a review until I clarified some things. Are you sure you only added 1/2 cup of water to the flour/starch mix to make the batter? Because when I added 1/2 cup it wasn't even wet enough to call a paste, let alone a batter. I had to add about another 1/4 - 1/2 cup for it be work. Also, I used a lot of oil - certainly more than 1 tbs per side. I sprayed at the beginning, the flipping point and halfway through each side and it the coating was still as dry as you said it would be if there was too little. Any ideas about what might have gone wrong? I used avocado oil on the first batch and and canola oil on the second batch and it didn't seem to matter.
christieathome
Hi Theresa, that's correct it should be 1/2 cup water until the batter is viscous and thin like in the video. As for the oil, feel free to add more oil as needed if you feel it requires more. I reviewed my instructions and I noticed one part that could have been misleading with regards to which bowl of dry batter to add the water to - it should be the one with less so I apologize for that! I've revised my instructions accordingly and once again my sincere apologies!
Theresa Sandifer
Thank you, that makes so much more sense. I did double check when it happened that you said the bowl with more in it, so I guess I was on the right track. The flavor of the chicken was so so good and it all worked out in the end.
christieathome
Yes you were right on track! My apologies once again. I'm so glad to hear it worked out in the end and you found it delicious regardless 🙂 I appreciate your kind review. Have a lovely day Theresa!
Jessa
Oh. My.
This was *delicious*. I wanted to try it ASAP and I couldn't find Japanese curry so I used Chinese 5 Spice. The star anise comes through a little heavy, and I only had garlic salt so I used San-J Tamari reduced sodium. I used chicken thighs, too. The recipe as written made enough to cover 4 chicken thighs.
I paid attention to your comment about how it might stick and used a lot of olive oil spray on the basket, and more on the top of the chicken. By the time I flipped, the top was crispy, crunchy, and a beautiful brown. It didn't stick but I did have some undercooked batter. Next time I'll let it drain a little longer before the second dredge.
The second batch (my tiny air fryer only holds 2 thighs at a time), I wasn't as careful about coating everything with oil and did lose some of the batter, but I just ate those bits as crunchy separates.
Excellent recipe, great technique with the triple coating. Gonna try this same method with my standby Southern fried chicken seasonings! Thanks a lot! (I'm so full, I couldn't stop eating chicken.)
christieathome
Thank you so much for making my recipe and for sharing your cooking experience with us! Chicken thighs are a fantastic substitute as they are so juicy! I'm so glad you enjoyed it with the Chinese five spice. Have a lovely evening!
Josephine
Hi Christie, I finally took my air fryer that has been sitting in the closet for Many months now. Lol!
I have a question on the type oil to be used. Does it have to be vegetable oil? All I have around the house right now are bottles and a can of avocado oil. Would this work? Or does it affect the fried chicken overall?
Thanks for sharing an awesome recipe!! ☺️
christieathome
Hi Josephine, thanks for the kind words! Great question - you can use avocado oil or any neutral tasting oil that you enjoy! I actually love using avocado oil for my fried recipes especially air fryer ones. Hope you enjoy my recipe 🙂
Milia
This was so crunchy and very flavourful down to the bone! Thanks for sharing!
christieathome
So glad you enjoyed my recipe! Thanks for making it!
Cut I Mariska
Hi Christie,
I made them few days ago. They turned out so crunchy & delicious! I definitely gonna make them again! Thanks a lot Christie!
Cheers 💞
Irma
Christie Lai
I am so happy to read this! Thanks so much for making my recipe and for leaving this kind review, Irma!