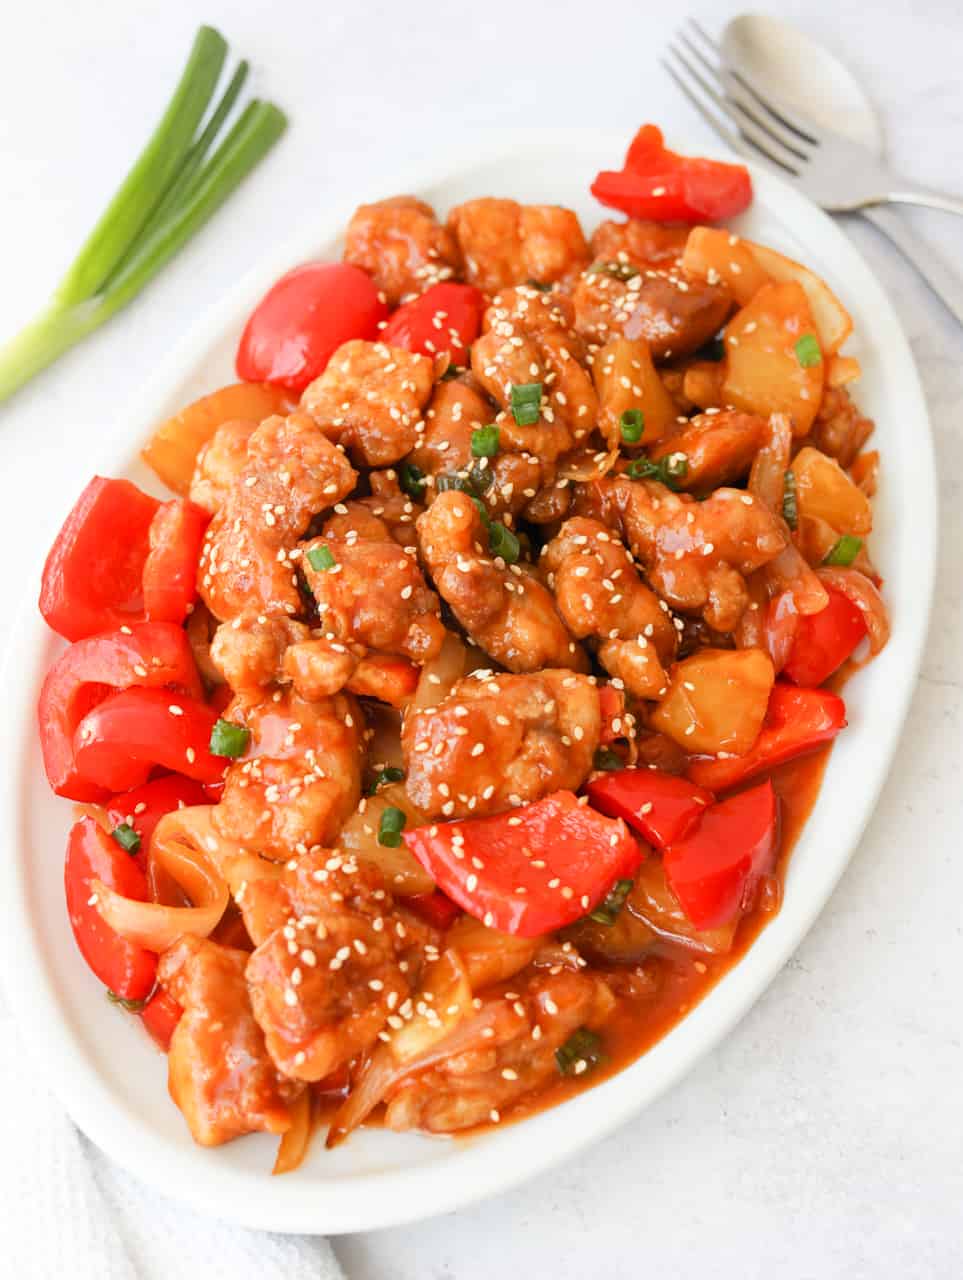
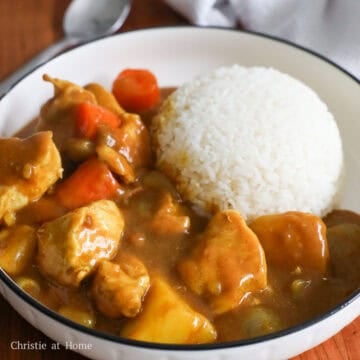
When you want Chinese takeout, make this easy sweet and sour chicken recipe in just 30 minutes. It features crispy fried chicken, sweet pineapple, and crunchy bell peppers tossed in a tangy glaze for a fast, family-friendly dinner.
Jump to:
Sweet and sour chicken 咕嚕雞 (goo low gai) has a special place in my heart. I first ate it at a local Chinese restaurant as a little girl and instantly fell in love with the combination. I've spent years tweaking this recipe in my kitchen. The secret to a perfectly balanced sweet and tangy sauce is a strict two-to-one ratio of sugar to vinegar with ketchup.
Why My Recipe Works
- Cornstarch seals moisture. Coating the meat in dry starch forms an instant crispy shell that blocks oil absorption.
- Thigh meat resists drying. Dark meat contains extra fat that keeps the chicken juicy during high-heat frying.
- Small batches maintain heat. Frying a few pieces at once prevents oil temperature drops to ensure a rapid, crunchy sear.
Ingredients & Substitutes
Exact ingredient measurements are listed in the recipe card at the bottom of this page.
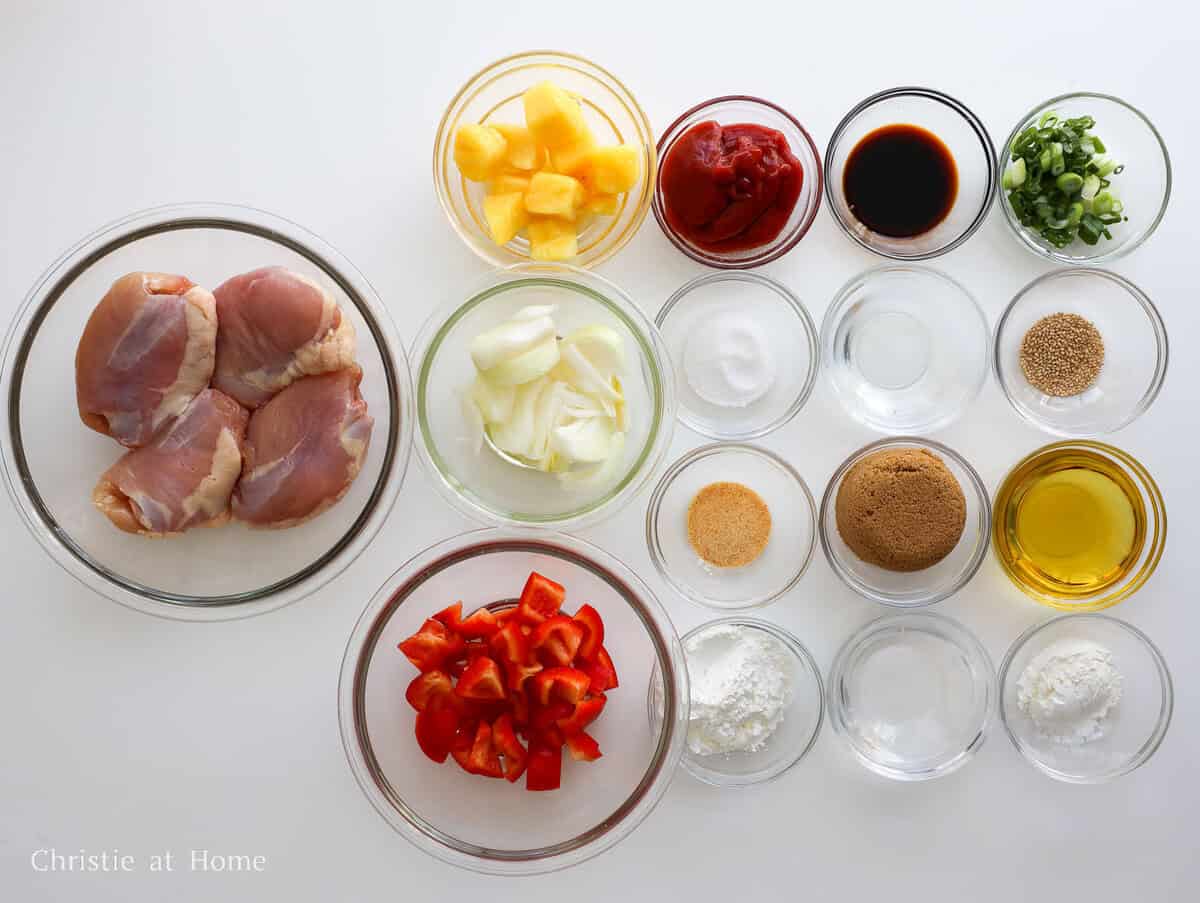
- Chicken Thighs: Boneless, skinless thighs for best juiciness. Sub: Skinless chicken breasts cooked to 160°F, then allow carryover cooking to bring them to 165°F.
- Red Bell Peppers: Adds crunch, flavor, and color. Subs: Green, orange, or yellow bell peppers.
- Fresh Ripe Pineapple: Adds sweetness to balance the tang. Subs: Thawed frozen pineapple chunks, with liquids strained, or canned pineapple, with liquids strained.
- Onion: Provides a sharp flavor that mellows the sweet tangy sauce.Sub: Equal parts chopped shallot.
- Cornstarch (for coating): This starch locks in moisture and creates a crispy crust. Sub: Potato starch. Avoid tapioca or arrowroot starch.
- Neutral Oil: Use avocado, peanut, vegetable, canola, or sunflower oil. Avoid olive oil or any low-smoke-point oils.
- Salt: Enhances the flavor of the meat.
- Garlic Powder: Adds concentrated savory flavor to the chicken. Do not sub with minced garlic or it will burn in the hot oil.
- Toasted Sesame Seeds: Used for garnishing to add a nutty aroma. Look for roasted or toasted labels.
- Green Onion: Used as a garnish to add color and flavor.
Sweet and Sour Sauce
- Ketchup: Adds a red color, sweetness, and acidity to the sauce.
- Brown Sugar: Balances the tartness with a caramel-like flavor. I prefer using light brown sugar but dark brown sugar can work too.
- Regular Soy Sauce: Adds salt and umami to balance the sweet tangy sauce. I prefer Lee Kum Kee or Kikkoman. Subs: Low-sodium or light soy sauce.
- White Vinegar: Adds a signature sharp tartness to the sauce. Sub: Equal parts rice vinegar or apple cider vinegar.
- Cold Water: A neutral liquid base for the sauce.
- Cornstarch: Thickens the sauce. Subs: Potato starch or tapioca starch.
Note: Most Asian ingredients are typically found at Asian grocery stores, or you can check online.
Instructions
Below are step-by-step instructions on how to make sweet and sour chicken:
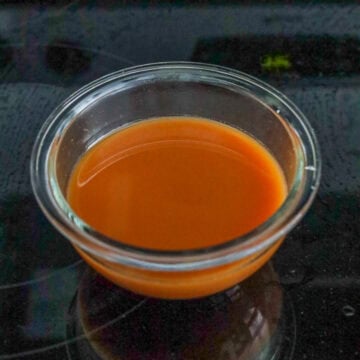
- Make the sauce: In a small bowl, whisk together the listed sauce ingredients and stir until the sugar is fully dissolved. Set aside.
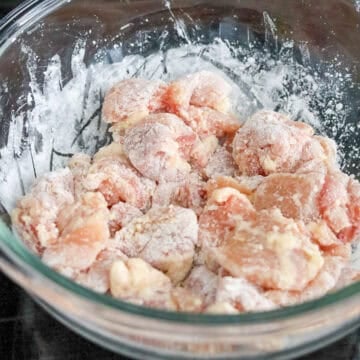
- Prepare chicken: Dice the chicken thighs into uniform 1.5-inch pieces and add to a large mixing bowl. Season with salt and garlic powder, then add cornstarch and toss until evenly coated with no dry spots.
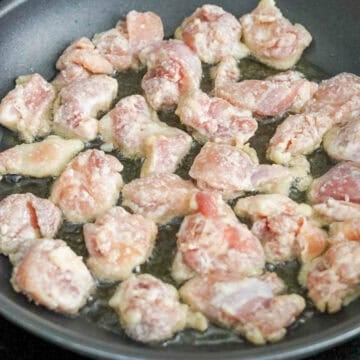
- Fry in batches: Heat vegetable oil in a large pan over medium-high heat. Fry chicken in small batches until golden, crispy, and cooked through, about 3-4 minutes per side.
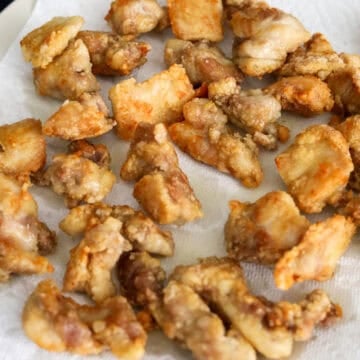
- Drain chicken: Transfer cooked chicken to a wire rack or paper towel-lined plate to drain excess oil and prevent sogginess.
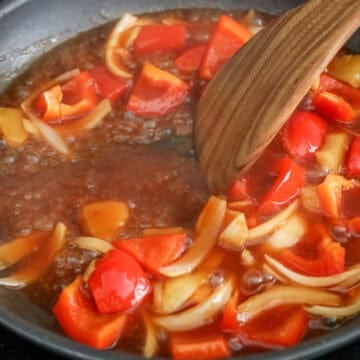
- Sauté veggies and simmer sauce: Reserve 1 teaspoon (5 ml) of oil in the pan and discard the rest. Reduce heat to medium and sauté onion, red bell pepper, and pineapple for 30-45 seconds. Add the sauce and simmer until thickened, about 30-45 seconds.
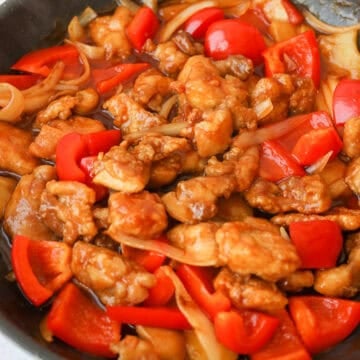
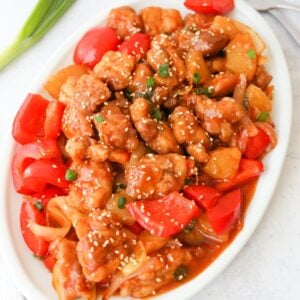
- Toss, garnish and serve: Add the chicken and toss to coat evenly. Remove from heat, garnish with green onions and sesame seeds, and serve.
Expert Tips
- Uniform Cuts: Slice chicken equally so all pieces cook at the same time.
- Firm Pressing: Squeeze meat into cornstarch to create ultra-crunchy, flaky ridges.
- Immediate Frying: Fry within two minutes of coating to avoid soggy starch.
- Small Batches: Cook fewer pieces at once to prevent steam from ruining the crust.
- Wire Rack Cooling: Drain chicken on a rack so the bottom stay crisp.
Variations
- Baked Version: Evenly spray coated chicken with neutral oil. Then arrange in a single layer on a greased baking sheet and bake at 400°F.
- Vegetarian: Swap the chicken with diced extra-firm tofu that has been patted dry and fry until golden and crispy.
- Gluten-free: Exchange the soy sauce with tamari sauce, coconut aminos, or gluten-free soy sauce.
Pairing Suggestions
- White Rice: A simple grain that absorbs the extra sweet glaze perfectly.
- Spicy Garlic Bok Choy: A bright green veggie that cuts through the rich meat.
- Egg Rolls: A crispy starter that matches the takeout theme.
Storage & Reheating
- Fridge: Keep in an airtight container up to 3 days.
- Freezer: Keep in a freezer bag up to 2 months. Thaw overnight.
- Best Practice: Separate the chicken from the sauce, vegetable, and pineapple mixture during storage to maintain optimal crispness.
- If Stored Together: Air fry at 350°F for 8 minutes, or bake at 400°F for 12 minutes.
- If Stored Separately: Air fry chicken at 350°F for 5 minutes or bake at 400°F for 8 minutes. Warm sauce in a skillet over low heat with a splash of water, then toss.
FAQ
Yes. Arrange coated chicken pieces in a greased air fryer basket in a single layer with space between them. Spray the tops with oil and air fry at 400°F for 10 to 14 minutes until golden, no flipping required. Combine the crispy chicken with your stovetop vegetables and sauce right before serving.
Mix the hot chicken into the warm sauce immediately before serving so the crust does not soften. Eat the dish right away before the starch absorbs the liquid. For the ultimate crunch, serve the thickened sauce in a separate bowl on the side as a dipping sauce.
Achieving the right crunch requires high heat and space. Overcrowding your pan traps moisture and steams the chicken instead of frying it. Also, if your oil is not hot enough, or if the starch coating is uneven, the chicken will absorb excess oil and become soggy. For best results, fry in small batches and avoid moving the chicken until the outer shell sets.
More Like This
📖 Recipe
Easy Sweet and Sour Chicken (Shallow Fried)
Ingredients
- 1 lb skinless boneless chicken thighs
- 1 medium red bell pepper or green bell pepper
- ½ cup pineapple diced into 1-inch chunks (or thawed frozen/canned pineapple chunks, liquids strained)
- ½ medium onion sliced
- ¼ cup cornstarch or potato starch
- ⅓ cup vegetable oil or any neutral oil
- 1 teaspoon salt
- ½ teaspoon garlic powder
- ½ teaspoon sesame seeds toasted kind
- 1 green onion finely chopped
Sweet and Sour Sauce
- ⅓ cup ketchup
- ½ cup brown sugar
- ¼ cup white vinegar or rice vinegar / apple cider vinegar
- 2 tablespoon water cold
- 1 tablespoon regular soy sauce or light soy sauce
- 1 tablespoon cornstarch or potato starch
Instructions
- In a small bowl, whisk together the listed sauce ingredients and stir until the sugar is fully dissolved. Set aside.
- Dice the chicken thighs into uniform 1.5-inch pieces and add to a large mixing bowl. Season with salt and garlic powder, then add cornstarch and toss until evenly coated with no dry spots.
- Heat vegetable oil in a large pan over medium-high heat. Fry chicken in small batches until golden, crispy, and cooked through, about 3-4 minutes per side.
- Transfer cooked chicken to a wire rack or paper towel-lined plate to drain excess oil and prevent sogginess.
- Reserve 1 teaspoon (5 ml) of oil in the pan and discard the rest. Reduce heat to medium and sauté onion, red bell pepper, and pineapple for 30-45 seconds. Add the sauce and simmer until thickened, about 30-45 seconds.
- Add the chicken and toss to coat evenly. Remove from heat, garnish with green onions and sesame seeds, and serve.
Tyler Marsh
Just a question, could you use coconut oil instead of canola oil or avocado oil? I have it on hand and was wondering if it would work!
Christie Lai
Unfortunately I wouldn't recommend coconut oil for most of my recipes as it has a low smoke point and a heavy scent. But any neutral tasting oil like sunflower oil, peanut oil, grapeseed oil, etc. will work!
Tyler
OMG this is it! I made this last night. After reading the reviews and looking over the recipe and watching the video a thousand times, I was confident enough to make two batches and I am so happy I did! I'm making this again this weekend with your wontons! I can't wait. Thank you so much for amazing Chinese dishes I can make from home instead of spending money on takeout that I don't even like! This is also my first review I've ever left it was just so good and easy to make.
Christie Lai
Awww wow thank you so much for making my recipe and for such a kind first review, Tyler! I am so thrilled to hear that everything worked out and you built up the confidence to cook this dish. Happy that I can share these recipes so you can save some money!
Shabnam
It was great had people over they all loved it!
christieathome
Awesome! Thanks for making my recipe, Shabnam!
Asia Scott
Made this last night and made no changes at except Red Pepper Flakes. We like Spicy. It was so good now going through you recipes to see what I am cooking tonight.
christieathome
Thank you so much for making my recipe! I am so happy that you enjoyed it, Asia! Yes, feel free to add some red pepper flakes to take it up a notch 🙂 I hope you enjoy my other recipes!
Quinn
made this recipe tonight as it wasnt a deep fried version, turned out great, and the sauce wasnt overly sweet like takeout
christieathome
Thanks for making my recipe, Quinn 🙂 Happy that I could share a "healthier" version of this classic dish and glad it turned out great!
Jeffrey Beaumont
Fantastic recipe, this is now one of my very favorite Chinese recipes. I used green onions for the garnish, and Avacado oil to fry the chicke. Also sprinkled some sesame seeds to serve. Served with plain old whit rice and the meal was wonderful, thank you, Jeff
christieathome
Thanks so much for making my recipe, Jeff! So glad it has become one of your favorite Chinese recipes. This makes me very happy to read. Have a lovely day!
Stacey
This was better than take out! I like how this recipe doesn’t call for deep frying and I was still able to get the chicken crispy. YUM!
christieathome
Amazing! Thanks for making my recipe! Glad you enjoyed it! ☺️
Hasin
Christie,
I just came to fetch this recipe as my girls like the sweet and sour chicken. Loved the fact it's not deeply fried.
Agustina
My friend! I’ve made the recipe and it came out spectacular! It was my first Asian food meal and I really enjoyed. The flavours, the ingredients and texture! Everything perfect! Thanks for sharing!
christieathome
Thank you so much for making my recipe!! I am really glad to read that you enjoyed it my friend! Happy it worked out and that I could introduce you to more Asian flavours 🙂
Gigi HD
This recipe was super easy to follow and so delish!! My 3yo girl is a huge fan of this dish and I’m now able to save $15/week on take out 🙂 I made two batches, one original for my girl and one spicy for myself by adding siracha to sauce mix. It was heavenly 🙂 Thanks Christie for this recipe!
Cambrea gordon
This sweet and sour chicken is honestly AMAZING. We tried the shallow pan fry and I actually love it more than the typical deep fry! The flavor of the sauce is delicious and it was even better the next day. My favorite part was that I didn't need to go to the store to buy canned pineapple, I had everything on hand to make it! Highly recommend this recipe!!
christieathome
Thank you so much for making my recipe Cam! I am so glad you enjoyed it and you liked the shallow frying technique! Happy to hear that the flavour was stronger the next day 🙂 That's always a good thing.
Liz
We made this tonight & it was better than take out!! I shallow fried the chicken & just added some pineapple! Delicious Thanks Christie, we’ll be making it again!
Rosemary
OKAY I had no idea that ketchup went into sweet and sour chicken!! How cool hehe you really do learn something every day! BTW-- this looks beautiful!
Jane
Not made yet, just made your Gochujang Chicken which went down really well - kids loved it and cleared their plates 😋😋
Thought I’d try sweet and sour next, as the chicken in the Gochujang was so good & crispy, can see how it would work well with the sweet and sour sauce.
A question about the brown sugar you use, is it dark or light?
Thanks
Christie Lai
Thanks so much for the kind words regarding my gochujang chicken! I'm glad you and your kids enjoyed that recipe!
As for the sweet and sour sauce, either light or brown sugar will work. I used dark brown sugar 🙂
Heidi | The Frugal Girls
I love what you used instead of pineapple juice to make the sauce... and those sesame seeds sprinkled on top make the chicken so tantalizing! 💕
Katerina | Once a Foodie
Mmmm, this looks absolutely delightful, Christie! I love that your version of sweet and sour chicken is not deep fried - that's so much better than the restaurant version. Yum!
Michelle | Sift & Simmer
Ahh this is such a nostalgic dish! My mom would make it on occasion since she doesn't like to deep fry too much. I love how your version is a shallow-fry -- keeps it a bit healthier! 🙂 Have a fantastic weekend, Christie!