

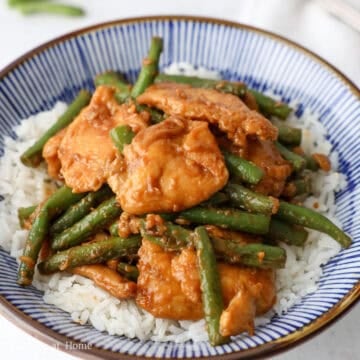
Crispy, juicy chicken pieces coated in a sticky, sweet and savory ginger sauce. This easy ginger chicken recipe is ready in just 30 minutes. I shallow-fry the cornstarch-coated chicken and let the crust set before flipping so it stays crispy.

Jump to:
Ginger chicken is a Chinese-inspired takeout-style dish featuring crispy fried chicken tossed in a sweet, savory, and gingery sauce.
This dish brings back memories of my old corporate job, when I treated myself to Chinese takeout every Friday. I always looked forward to the crispy chicken coated in that delicious ginger sauce, so I had to recreate it at home.

When I make this for lunch or dinner, I fry the chicken in small batches to keep the oil hot so the coating stays crispy instead of soggy. I also thicken the sauce before tossing in the chicken to help preserve its crispy texture.
Ingredients & Substitutes
Exact ingredient amounts are listed in the recipe card at the bottom of this page.
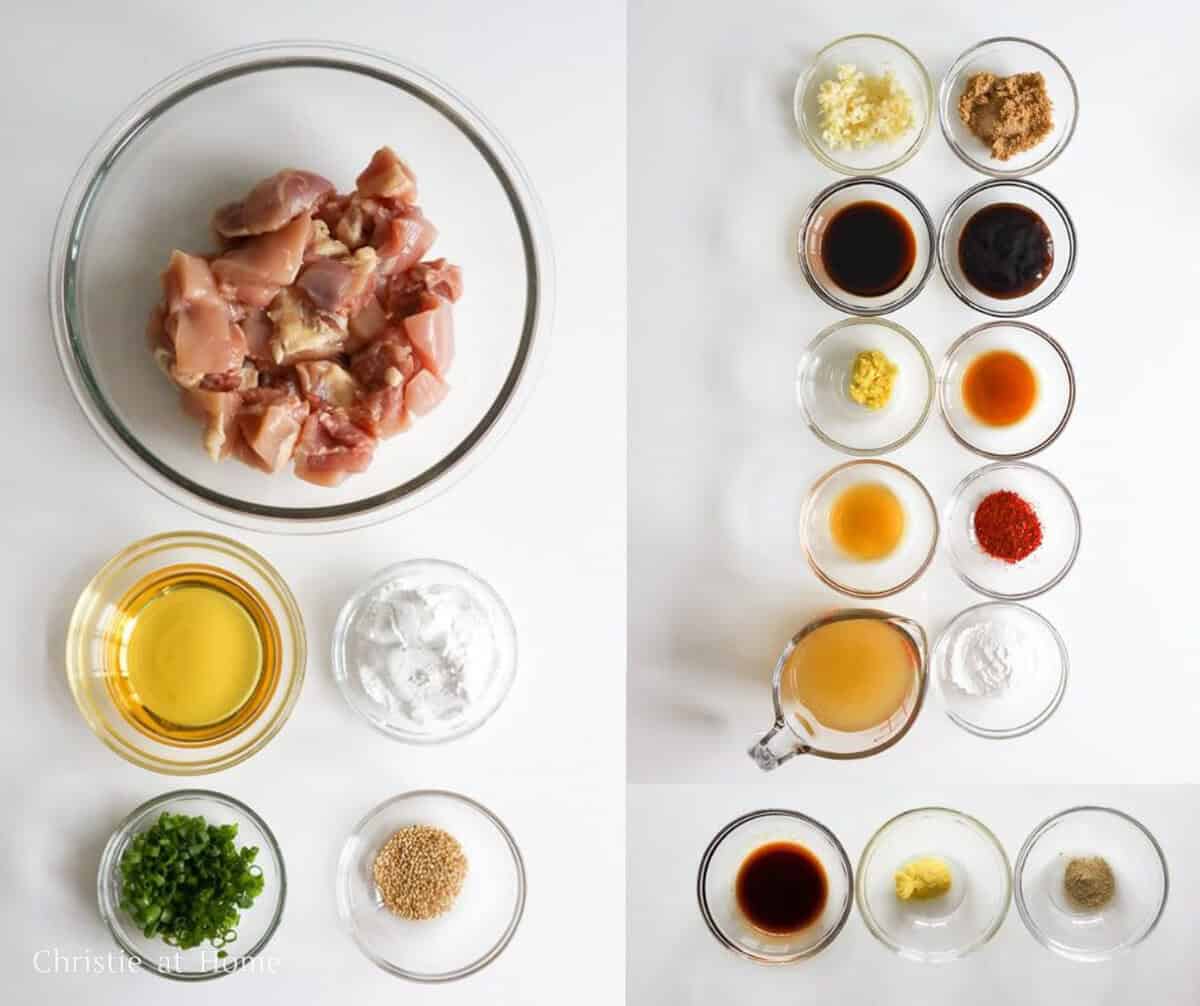
- Chicken Thighs: Use boneless, skinless chicken thighs because their higher fat content keeps them juicy during frying. Chicken breast also works but requires a shorter cooking time since it's leaner and more prone to drying out.
- Vegetable Oil: Use a neutral oil with a high smoke point for frying, such as vegetable, canola, or refined avocado oil.
- Cornstarch: Creates a light, crispy coating on the chicken. Potato starch also works, but avoid tapioca starch because the chicken pieces can stick together.
- Toasted Sesame Seeds: Use toasted or roasted sesame seeds for a nutty flavor. If unavailable, toast raw sesame seeds in a dry pan over medium heat until fragrant.
- Green Onion
Chicken Seasoning
- Regular Soy Sauce: Seasons the chicken. Light soy sauce also works. Use low-sodium soy sauce for less salt.
- Fresh Ginger: Adds ginger flavor directly to the chicken. Finely grate so it coats the pieces evenly.
- White Pepper: Adds a mild, earthy heat commonly found in Chinese cooking. Black pepper works too but has a sharper flavor.
Sauce
- Garlic: Use fresh garlic for the best flavor.
- Light Brown Sugar: Balances the salty soy sauce and pungent ginger. Dark brown sugar also works.
- Regular Soy Sauce: Adds a savory, salty flavor that balances the sweetness of the sauce. Light soy sauce also works. Use low-sodium soy sauce for less salt.
- Hoisin Sauce: Adds a rich, sweet and savory flavor to the ginger sauce.
- Fresh Ginger: Gives the sauce its signature pungent ginger flavor. Finely grate for a stronger ginger flavor. Avoid ground ginger because it won't give the sauce the same fresh flavor.
- Toasted Sesame Oil: Adds a rich, nutty aroma to the sauce.
- Shaoxing Wine: A fermented Chinese rice wine that adds savory depth to the sauce. Dry sherry also works.
- Cornstarch: Thickens the sauce so it clings to the crispy chicken. Potato starch also works.
- Red Pepper Flakes: Adjust to taste. I prefer gochugaru for milder heat, but Sichuan red pepper flakes also work.
- Chicken Stock: Adds a savory base to the sauce. Use low-sodium chicken stock to control the saltiness.
Note: Asian ingredients are typically available at most Asian grocery stores or online.
Expert Tips
- Use a cooking thermometer to keep the oil at 325-350°F for a crispy, evenly fried coating.
- For extra crispiness, press the cornstarch onto the chicken to create rough edges that crisp up during frying.
- Coat the chicken just before frying to prevent moisture from making the cornstarch coating soggy.
- Shake off loose cornstarch to prevent excess starch from falling into the oil and burning.
- Remove browned bits between batches to prevent leftover cornstarch from burning and giving the chicken a bitter taste.
- Toss with sauce just before serving to prevent the crispy coating from absorbing moisture and softening.
Instructions
Below are step-by-step instructions on how to make ginger chicken:

- Combine the sauce: Whisk all the listed sauce ingredients together in a small bowl until the sugar dissolves. Set aside.

- Season the chicken: Dice the chicken thighs into 1.5-inch pieces and transfer to a large bowl. Don't pat them dry; the natural surface moisture helps the cornstarch stick. Add the soy sauce, grated ginger, and white pepper, then toss until evenly seasoned.

- Coat with cornstarch: Sprinkle the cornstarch over the seasoned chicken and toss until evenly coated. If any areas remain uncoated, add 1-2 tablespoons more cornstarch as needed.

- Fry the chicken: Heat vegetable oil in a large, heavy-bottomed pan over medium-high heat to 350°F. Fry the chicken in a single layer, working in small batches, for about 5-7 minutes per batch. Leave the chicken undisturbed until the bottom is golden and the crust has set before flipping. Cook until both sides are golden and the internal temperature reaches 165°F. Transfer to a wire rack to keep it crispy. Allow the oil to reheat between batches.

- Simmer the glaze: Remove any excess oil from the pan and reduce the heat to medium. Whisk the sauce again, pour it into the pan, and simmer until thickened and glossy.

- Toss and garnish: Add the cooked chicken to the thickened sauce and toss until evenly coated. Remove from the heat and sprinkle with sliced green onions and toasted sesame seeds. Serve immediately.
Storage & Reheating
- Refrigerator: Store leftover ginger chicken in an airtight container for up to 4 days.
- Freezer: Let leftover chicken cool, then transfer it to a freezer-safe bag and freeze for up to 2 months. Thaw overnight in the refrigerator before reheating. The coating will soften after thawing.
- Reheating: Reheat in the microwave in 1-minute intervals, stirring between intervals, or in the oven at 350°F for about 10-15 minutes, until heated through to 165°F.
Variations
- Gluten-Free: Use gluten-free soy sauce or tamari, gluten-free hoisin sauce, and dry sherry instead of Shaoxing wine.
- Extra Spicy: Add more red pepper flakes to the ginger sauce for extra heat.
Pairing Suggestions
Serve crispy ginger chicken with:
- Egg Fried Rice: Fluffy, savory rice complements the sweet and savory ginger chicken.
- Garlic Gai Lan: Tender Chinese broccoli balances the rich chicken.
- Crab Rangoon: Crunchy, creamy wontons make a delicious appetizer.
FAQ
Yes! Lightly spray the air fryer basket with oil. Arrange the cornstarch-coated chicken in a single layer, working in batches, and spray the chicken with oil. Air fry each batch at 400°F for about 10-14 minutes, without flipping, until golden and crispy and the internal temperature reaches 165°F. Prepare the sauce as directed in the recipe card, then toss with the air-fried chicken. Serve immediately.
For a non-spicy version, simply omit the red pepper flakes. The fresh ginger will still add a mild, warming kick without making the sauce spicy.
More Like This
Check out my other fried chicken recipes:
📖 Recipe

Easy Ginger Chicken (30 Minutes)

Ingredients
- 1 lb skinless boneless chicken thighs
- ¼ cup vegetable oil or any neutral oil
- ⅓ cup cornstarch
- 1 green onion finely chopped
- ½ teaspoon sesame seeds toasted kind
Chicken Seasoning
- 2 teaspoon regular soy sauce or light soy sauce
- 1 teaspoon ginger grated
- ¼ teaspoon white pepper or black pepper
Sauce
- 3 garlic cloves minced
- 2 tablespoon brown sugar
- 2 tablespoon regular soy sauce or light soy sauce
- 2 tablespoon hoisin sauce
- 1 tablespoon ginger grated
- 2 teaspoon sesame oil toasted
- 1 teaspoon Shaoxing wine or dry sherry
- 1 tablespoon cornstarch
- 1 teaspoon red chili flakes
- ½ cup chicken stock low-sodium
Instructions
- Whisk all the listed sauce ingredients together in a small bowl until the sugar dissolves. Set aside.
- Dice the chicken thighs into 1.5-inch pieces and transfer to a large bowl. Don't pat them dry; the natural surface moisture helps the cornstarch stick. Add the soy sauce, grated ginger, and white pepper, then toss until evenly seasoned.
- Sprinkle the cornstarch over the seasoned chicken and toss until evenly coated. If any areas remain uncoated, add 1-2 tablespoons more cornstarch as needed.
- Heat vegetable oil in a large, heavy-bottomed pan over medium-high heat to 350°F. Fry the chicken in a single layer, working in small batches, for about 5-7 minutes per batch. Leave the chicken undisturbed until the bottom is golden and the crust has set before flipping. Cook until both sides are golden and the internal temperature reaches 165°F.
- Transfer to a wire rack to keep it crispy. Allow the oil to reheat between batches.
- Remove any excess oil from the pan and reduce the heat to medium. Whisk the sauce again, pour it into the pan, and simmer until thickened and glossy.
- Add the cooked chicken to the thickened sauce and toss until evenly coated. Remove from the heat and sprinkle with sliced green onions and toasted sesame seeds. Serve immediately.
Laarni F
Thank you for the recipe! My family loves it, it tastes just like the restaurant! I reduced the brown sugar by just a little bit and it was still good. Thanks again!
Christie Lai
Thank you so much for making my recipe and for this 5-star review, Larrni! Happy you enjoyed it and thanks for sharing that with us - I'm sure many will find it helpful.
Wilma Uijterlinde
Can’t believe I just made “the Best Ginger Chicken I ever tasted” !!!
This recipe will go for sure in my binder for the next time 😋Thank you so much !!
Christie Lai
Haha! I loved reading this. Thank you so much for making my recipe and for leaving this positive review, Wilma! Glad it's going into the recipe binder!
Marjorie Jackson
Loved it!m
Christie Lai
Thank you so much for the kind and positive review! So glad you enjoyed it!
Manon Sheiman
I've been studying the recipe for about an hour, and I am eager to make it along with others you have listed here such as orange chicken, but it is so difficult to try to get past the ads and to find the X to get them out of the way of the print that I am completely flummoxed and frustrated.
I would love to pay for the recipes in order to get a clean recipe sheet without ads covering the page. Is there a way to do that, or do you have a cookbook I can purchase?
Please and thank you very much!
Christie Lai
Hi Manon, sorry to hear that you're experiencing difficulties with the ads. I would suggesting clicking "Jump to Recipe" and then click "Print recipe" (the green button under the recipe description) for an Ad-less version. Hope this helps!
Nina
Excellent, delicious. Good instructions!
Christie Lai
Yay! So happy to read this, Nina. Thank you so much for making it and sharing your positive experience here!
Liz from Canada
I'm rating this recipe a 10, out of 5!
I made this for dinner tonight, and all I can say is WOW!!
It was fun to prepare and so delicious to eat.
I served it over white and wild rice.
I had NO idea cornstarch could make chicken THIS tender.
No. Idea.
Thank YOU for this great recipe.
I'll have to try them all. lol..
Christie Lai
I am soooo thrilled to hear this! Glad it worked out well and I appreciate the raving review. Happy to hear it was fun to prepare and delicious. Cornstarch is really a wonder when it comes to tenderizing meat 🙂 I hope you enjoy the rest of my recipes 🙂
Liz from Canada
Because of your tip💡 on cornstarch, now I just used it on pork🥩.
WOW! What a find🕵️♀️.
Soon, I plan on making👨🍳 ginger fried beef🥩, yum!
Believe it or not, it's a 🇨🇦 "thing", but more specifically in British Columbia and Alberta provinces.
It's insanely good🤪😜😂.
克里斯蒂,再次感谢你提供的这份美妙的食谱和令人惊叹的配料提示。❣️
Christie Lai
I am so glad my cornstarch trick worked well and have fun making ginger beef! I've had ginger beef many times in Toronto (I agree, it's deliciously addictive!) and I will be creating a recipe for it soon in the future.
Jd
How I'd wish I can make all of your recipes
Indy
Just tried this and it was fantastic. Really tasty, and yes, it's beats a takeaway!!
Christie Lai
Thanks so much for making my recipe and for the positive review, Indy 🙂 So glad it beats takeaway! Have a fantastic day 🙂
Margaret
An amazing recipe. So simple. Flavor out of this world. Air fried the chicken as recipe option instructs- so tender and crispy! A must try
christieathome
Thanks so much for making my recipe, Margaret! So happy the flavor was out of this world! Also happy to read that the air frying option worked out well 🙂