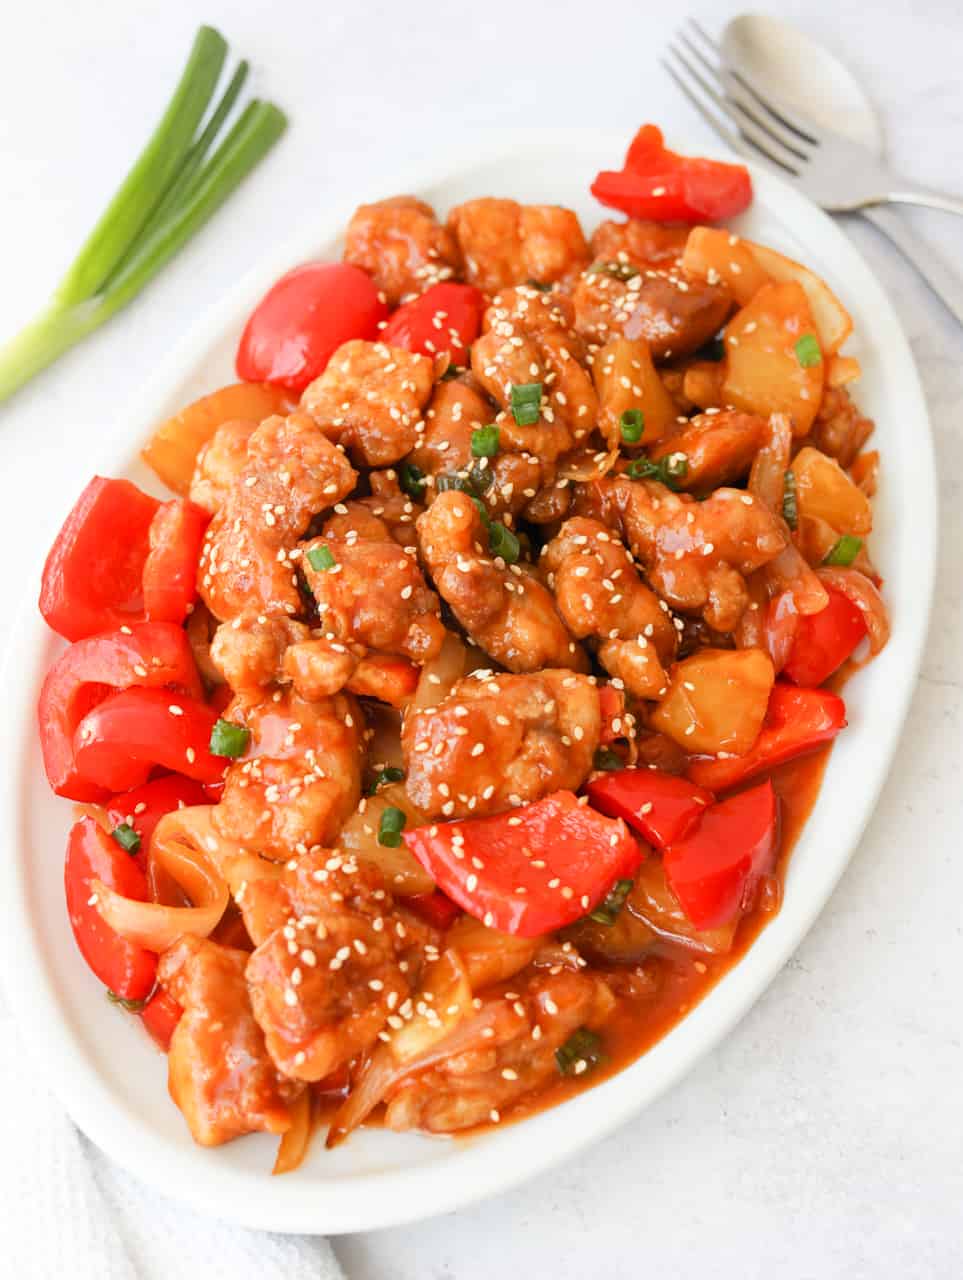
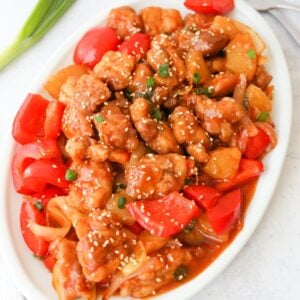
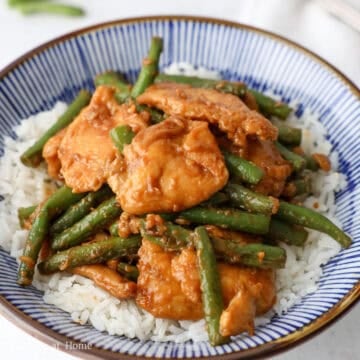
Bite-sized pieces of fried chicken tossed in a sweet, tangy sauce with crisp bell peppers, onions, and pineapple! This easy sweet and sour chicken recipe uses simple ingredients and is ready in 30 minutes. It's better-than-takeout main perfect for busy weeknights and families.
Jump to:
Sweet and sour chicken is a popular Chinese takeout dish that originates from Guangdong, China. It's served at Chinese restaurants and pairs best with jasmine rice and vegetables.
Traditional sweet and sour chicken did not use ketchup for that signature red color and instead used the natural coloring from hawthorn berries, but that has changed with the modern adaptation of this dish.
Whenever my husband and I are craving Chinese food, I'll make this Asian fried chicken recipe and it truly hits the spot, thanks to the sweet and savory flavors!
Why This Recipe Works
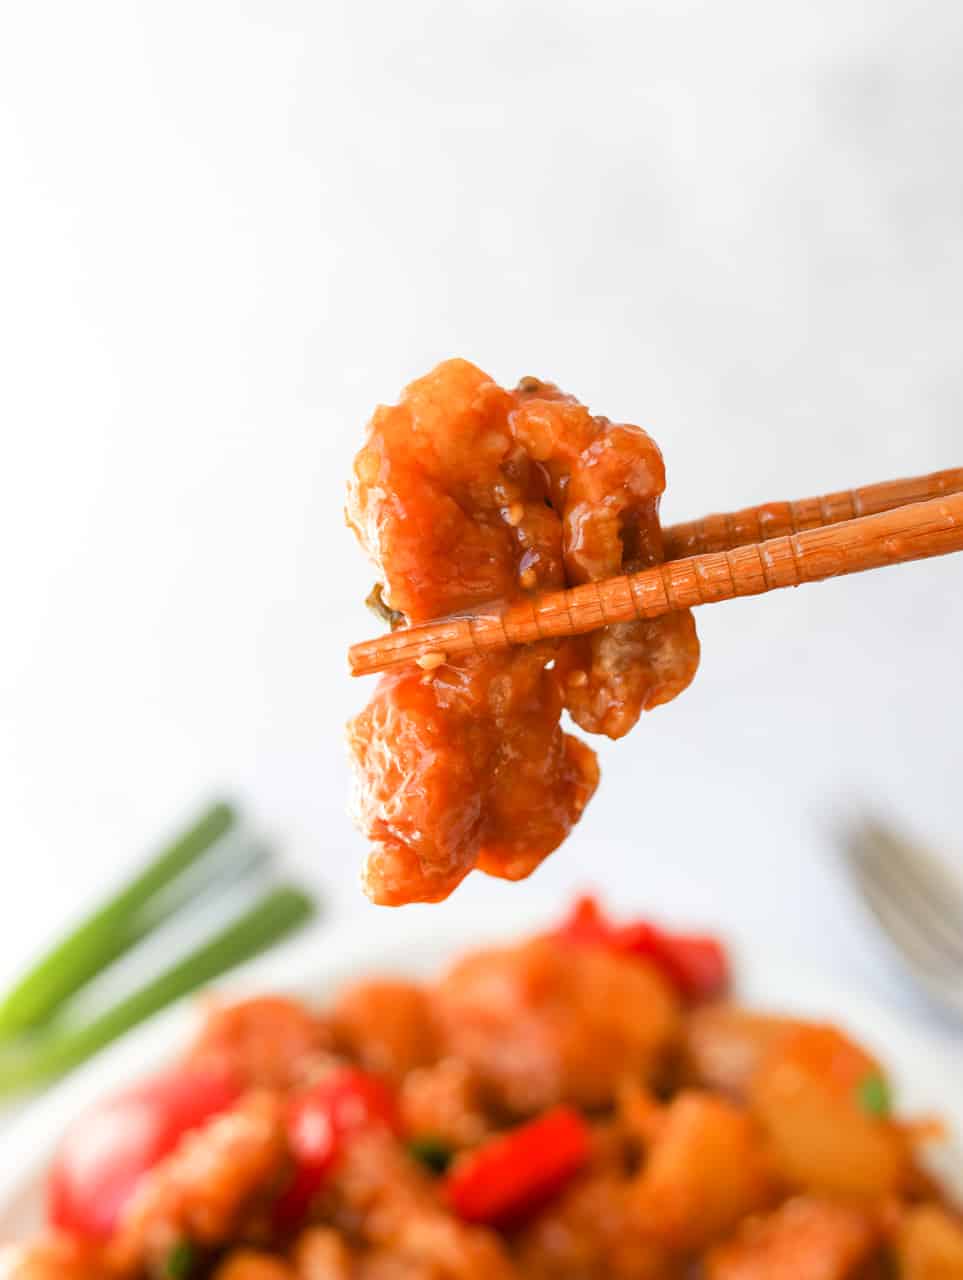
- We coat the chicken in cornstarch and shallow-fry it in a small amount of oil for a crisp texture - no wet batter and less oil overall.
- I’ve found chicken thighs work best after testing different cuts, as they stay juicy and don't dry out.
- Many sweet and sour chicken recipes turn out soggy; frying in small batches keeps the chicken crisp.
Ingredients & Substitutes
Please scroll to the recipe card below for exact measurements.
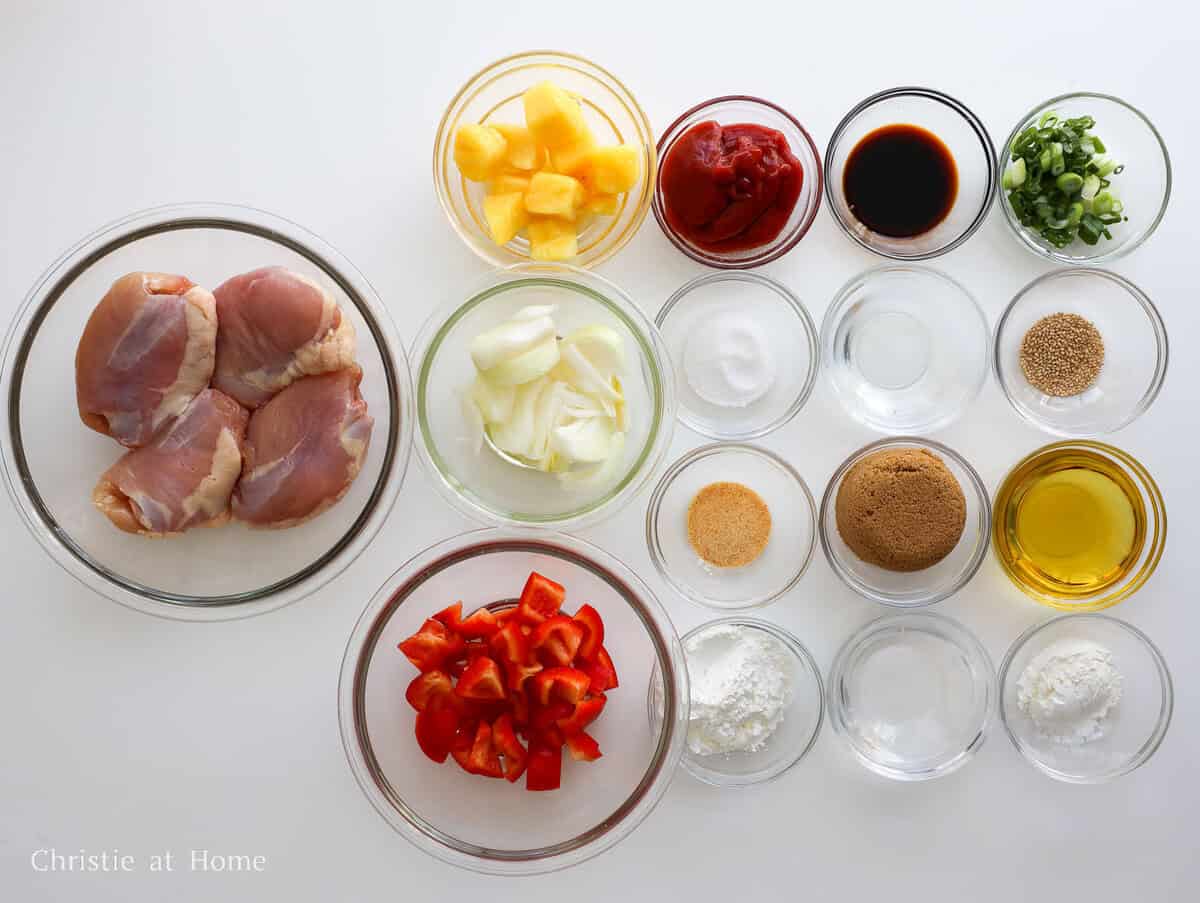
- Chicken Thighs: I recommend using skinless boneless chicken thighs for best texture. Substitution: Use skinless chicken breasts and cook until they reach an internal temperature of 160°F; let carryover cooking bring it to 165°F for tender results.
- Red Bell Peppers: To add crunch and color. Substitution: Orange, yellow, or green bell peppers.
- Pineapple: I recommend using fresh ripe pineapple for best results. Substitution: Thawed frozen pineapple chunks, with liquids strained or canned pineapple; liquids strained.
- Onion: To add aroma. Substitution: Shallot.
- Cornstarch: This makes the chicken crispy. Substitution: Potato starch. Avoid using tapioca starch or arrowroot starch as the chicken will stick together in the pan.
- Neutral Oil: Use high-smoke-point oils like avocado, peanut, vegetable, canola/rapeseed, or sunflower oil. Avoid extra-virgin olive oil (smokes at high heat).
- Salt
- Garlic Powder: Do not use minced garlic or it'll burn in the pan.
- Toasted Sesame Seeds: Look for "roasted" or "toasted" labels. If unavailable, toast raw seeds in a dry pan until fragrant. This is a garnish.
- Green Onion: To add aroma and color. This is a garnish.
Sweet and Sour Sauce
- Ketchup: To add a red color and a tangy flavor.
- Brown Sugar: To add a caramel-like flavor. I like using light brown sugar but dark brown sugar works too.
- Regular Soy Sauce: Any all-purpose brand works [I recommend Kikkoman or Lee Kum Kee]. Low-sodium or light soy sauce also work.
- White Vinegar: To add acidity. Substitution: Rice vinegar or apple cider vinegar.
- Cold Water
- Cornstarch: To thicken the sauce. Substitution: Potato starch, tapioca starch, or arrowroot starch.
Note: Most Asian ingredients are typically found at Asian grocery stores, or you can check online.
Instructions
Below are step-by-step instructions on how to make sweet and sour chicken:
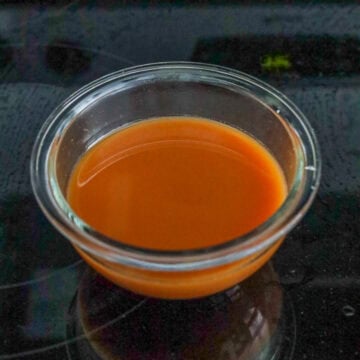
- Make the sauce: In a small bowl, combine the sauce ingredients as listed above and stir until the sugar is fully dissolved. Set aside.

- Prepare the chicken: Dice the chicken thighs into 1.5-inch pieces and place in a large bowl. Season with salt and garlic powder, then add cornstarch and toss until evenly coated with no dry spots.

- Fry the chicken: Heat vegetable oil in a large pan over medium-high heat. Fry in small batches until golden, crispy, and cooked through, about 3-4 minutes per side.
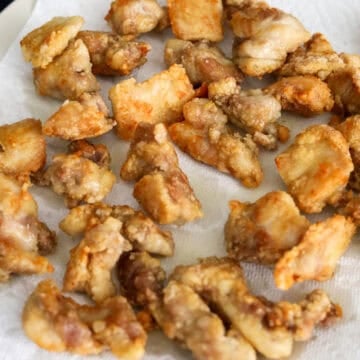
- Drain the chicken: Transfer to a wire rack or paper towel-lined plate to drain excess oil and prevent sogginess.
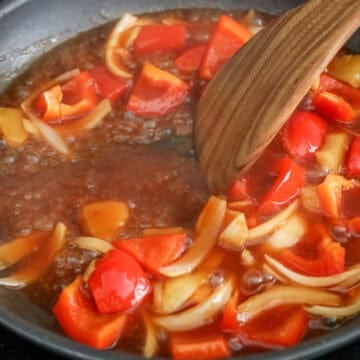
- Sauté vegetables and thicken sauce: Reserve 1 teaspoon (5 ml) of oil in the pan and discard the rest. Reduce heat to medium and sauté onion, red bell pepper, and pineapple for 30-45 seconds. Add the sauce and simmer until thickened, about 30-45 seconds.
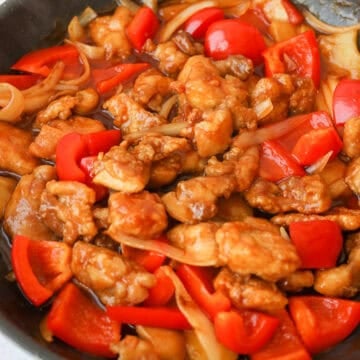
- Finish: Add the fried chicken and toss to coat evenly. Remove from heat, garnish with green onions and sesame seeds, and serve.
Expert Tips
- Don't pat the chicken dry - some moisture helps the cornstarch adhere.
- Cut the chicken into even pieces so it cooks and fries at the same rate.
- Use a heavy-bottomed pan to maintain a steady oil temperature.
- Heat the oil to 325-350°F before frying for proper crisping.
- Fry in small batches to keep the oil hot and prevent soggy coating.
- Let the chicken cook undisturbed so it develops a crisp, golden crust.
Variations
- Pork version: Swap the chicken thighs with diced pork shoulder and cook until it reaches an internal temperature of 145ºF.
- Shrimp version: Swap the chicken with peeled deveined jumbo shrimp and cook until golden and crispy.
- Tofu version: Swap the chicken with diced extra-firm tofu and cook until golden and crispy.
- Gluten-free version: Swap the soy sauce with tamari sauce, coconut aminos, or gluten-free soy sauce.
Pairing Suggestions
Sweet and sour chicken pairs well with:
- Starters: Egg Rolls, Crab Rangoon, Egg Drop Soup, or Hot and Sour Soup.
- Rice Dishes: White Rice or Fried Rice.
- Noodle Dishes: Chow Mein or Lo Mein.
- Vegetable Dishes: Spicy Garlic Bok Choy or Chinese Garlic Yu Choy.
- Protein Dishes: Honey Walnut Shrimp, Egg Foo Young, or Soy Garlic Tofu.
Storage & Reheating
- Leftover sweet and sour chicken can last up to 4 days when stored in an airtight container in the fridge. To enjoy, reheat in the microwave or on the stovetop until heated through.
- Freezer: Sweet and sour chicken can be frozen for up to 2-3 months in a freezer-safe bag once cooled. For best texture, freeze the sauce, vegetables, and chicken separately. To serve, thaw overnight in the fridge and reheat on the stovetop or in the microwave until hot.
FAQ
Sweet and sour chicken can be made up to 4 days ahead and stored in an airtight container in the fridge once cooled. For best texture, keep the fried chicken separate from the sauce and vegetables. Reheat in the microwave or on the stovetop until hot before serving.
Sweet and sour chicken can be made in the air fryer. Lightly oil the basket, then arrange the coated chicken in a single layer with space between pieces and spray with oil. Air fry at 400°F (200°C) for 10-14 minutes until golden, crispy, and cooked through (no flipping). Simmer the sauce until thickened, then toss with the chicken to coat.
Several factors can prevent crispy chicken: uneven starch coating, oil that isn't hot enough, heat set too low, or an overcrowded pan. Moving the chicken too often while frying can also prevent a proper crust from forming.
More Like This
📖 Recipe
Quick & Easy Sweet and Sour Chicken
Ingredients
- 1 lb skinless boneless chicken thighs
- 1 medium red bell pepper or green / yellow / orange bell pepper - large diced
- ½ cup pineapple diced into 1-inch chunks
- ½ medium onion sliced
- ¼ cup cornstarch or potato starch
- ⅓ cup vegetable oil or any neutral oil
- 1 teaspoon salt
- ½ teaspoon garlic powder
- ½ teaspoon sesame seeds toasted kind, optional garnish
- 1 green onion finely chopped
Sweet and Sour Sauce
- ⅓ cup ketchup
- ½ cup brown sugar
- ¼ cup white vinegar or rice vinegar / apple cider vinegar
- 2 tablespoon water cold
- 1 tablespoon regular soy sauce or light soy sauce
- 1 tablespoon cornstarch or potato starch
Instructions
- In a small bowl, combine the sauce ingredients as listed above and stir until the sugar is fully dissolved. Set aside.
- Dice the chicken thighs into 1.5-inch pieces and place in a large bowl. Season with salt and garlic powder, then add cornstarch and toss until evenly coated with no dry spots.
- Heat vegetable oil in a large pan over medium-high heat. Fry in small batches until golden, crispy, and cooked through, about 3-4 minutes per side.
- Transfer to a wire rack or paper towel-lined plate to drain excess oil and prevent sogginess.
- Reserve 1 teaspoon (5 ml) of oil in the pan and discard the rest. Reduce heat to medium and sauté onion, red bell pepper, and pineapple for 30-45 seconds. Add the sauce and simmer until thickened, about 30-45 seconds.
- Add the fried chicken and toss to coat evenly. Remove from heat, garnish with green onions and sesame seeds, and serve.


Cathy
Thank you so much for this very easy and delicious dinner . I made this last evening for my grown up grandchildren who absolutely loved it !
A very authentic taste too . 😊
Christie Lai
Thanks so much for making my recipe, Cathy! So happy you found it authentic tasting 🙂
Elly Heikoop
Fantasties wij vonden het super lekker en zeker voor herhaling vatbaar. Die 2 eetlepels water heb ik vervangen door 2 eetlepels ananassap. Echt een aanrader.
Christie Lai
Thank you so much for making my recipe and for the kind review! Glad you loved it and great tip on the pineapple juice!
Malia
So delicious but not as crispy as expected, maybe I did something wrong? Overall so good and recommend this recipe
Christie Lai
Thanks for making my recipe, Malia! Some tips on getting the chicken crispier: ensure that it's evenly coated in the cornstarch, make sure the oil is hot before frying, fry in small batches to maintain the oil temperature, and most importantly drain off the excess oil on wire rack or paper towel lined plate as the excess oil will make the fried chicken soggy. I also recommend frying the chicken longer until it's crispy to your liking, as each stovetop varies in heat settings unfortunately. Hope this helps!
Halina
I love your recipes. Thank you for sharing 🤗
Christie Lai
Thank you so much for this very kind and positive comment! You made my day, Halina!
Judith
Wow!!!! this chicken was DIVINE!!! will definitely be making again! I've passed it on to friends already who are also obsessed with it!!! I made it without adding the stir-fry (since I'm not a fan of fried veg) and it still tasted incredible! thank you so so much for this! Much appreciation from me and my family 🙂
Christie Lai
Thanks so much for making my recipe and for this raving review, Judith! I also really appreciate you sharing my recipe and glad you enjoyed it 🙂
Bernard M Rosenberg
my family loved the sweet and sour chicken !
Christie Lai
Thrilled to read this and thank you so much for making my recipe, Bernard! So glad the whole family loved it!
Dolo
Another winner winner chicken dinner! I had this ready in 20 minutes flat and it was truly better than I've had in any restaurant. I make everything from scratch these days so I know exactly what we're eating. It was a real pleasure to make this delectable dish without any preservatives or funky chemicals and without oil frying the chicken! It's a gift finding you and your site, I'm off to see what other gems you have. Thank you Thank you again! 😘
Christie Lai
Aww your comments are making my tear up in a great way! THANK YOU so much for truly bringing joy to my day. I'm very thankful for readers like you and you motivate me to keep going.
Susan
This was one of the best recipes I've made in awhile. I followed the recipe, one exception, I added 2 tablespoons of pineapple juice to the sauce recipe. This was absolutely delicious...I will definitely share this with family and friends. Very flavourful..
Susan from Canada 🇨🇦
Christie Lai
Amazing! So happy to read this and glad you enjoyed it with some pineapple juice added to the sauce. Thank you for making my recipe and for sharing it with friends & family. Susan!
Anthony
Just tried this and it was delicious. Crumpy chicken and amazing sauce
Christie Lai
Thank you so much for making my recipe and so glad you enjoyed it!
Erin Ormsby
Added crushed red pepper to the sauce but other than that- followed the recipe- fantastic! Will add to my rotation!
Christie Lai
Thank you so much for making my recipe and so glad you liked it!
Dolo
Erin! I'm going to try Melinda's ghost pepper ketchup in this recipe next week! 😁
Stella Mak
Tried this for the first time trying to cook for my family... Nervous at first but your guide was very helpful. Turned out so good... Happy with the results. ❤️❤️❤️
Christie Lai
I am so happy to read this! Thank you so much for making my recipe and for sharing your positive experience, Stella!